
Scan QR code to install
Congratulations! You have just purchased the concrete tester eBT-2. The concrete tester eBT-2 is a rheometer for fresh concrete. Fresh concrete is a so called bingham fluid. The flow characteristics of such a fluid can be described by two paramaters: the relative yeald value and the relative viscosity. Both can be measured with the eBT-2. This allows to measure the rheological parameter of fresh concrete direct on the building site. The eBT-2 includes the following components:
All needed apps are preinstalled, the eBT2 and smartphone are paired (Bluetooth).
The app for the smart phone (BetonTester Programm; file
de.schleibinger.BetonTester.apk) is already installed there.
The latest version can be downloaded from the Schleibinger eBT-2 page.
| Scan QR code to install |
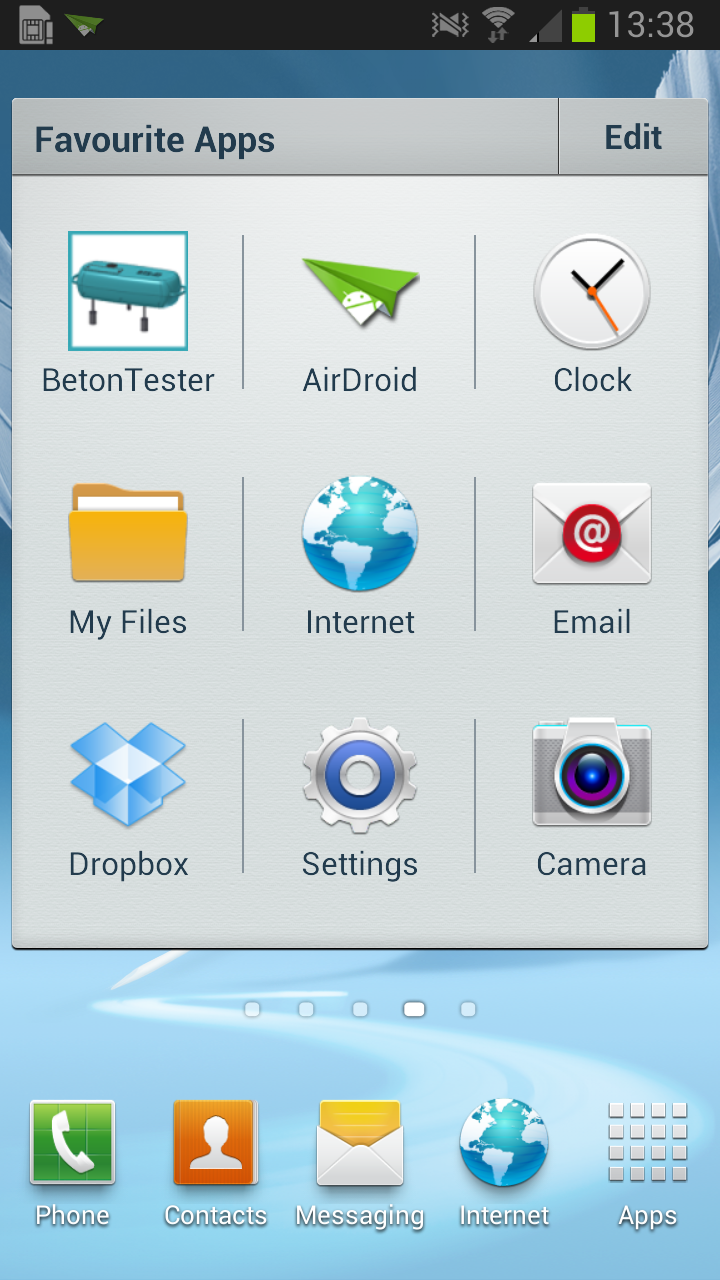

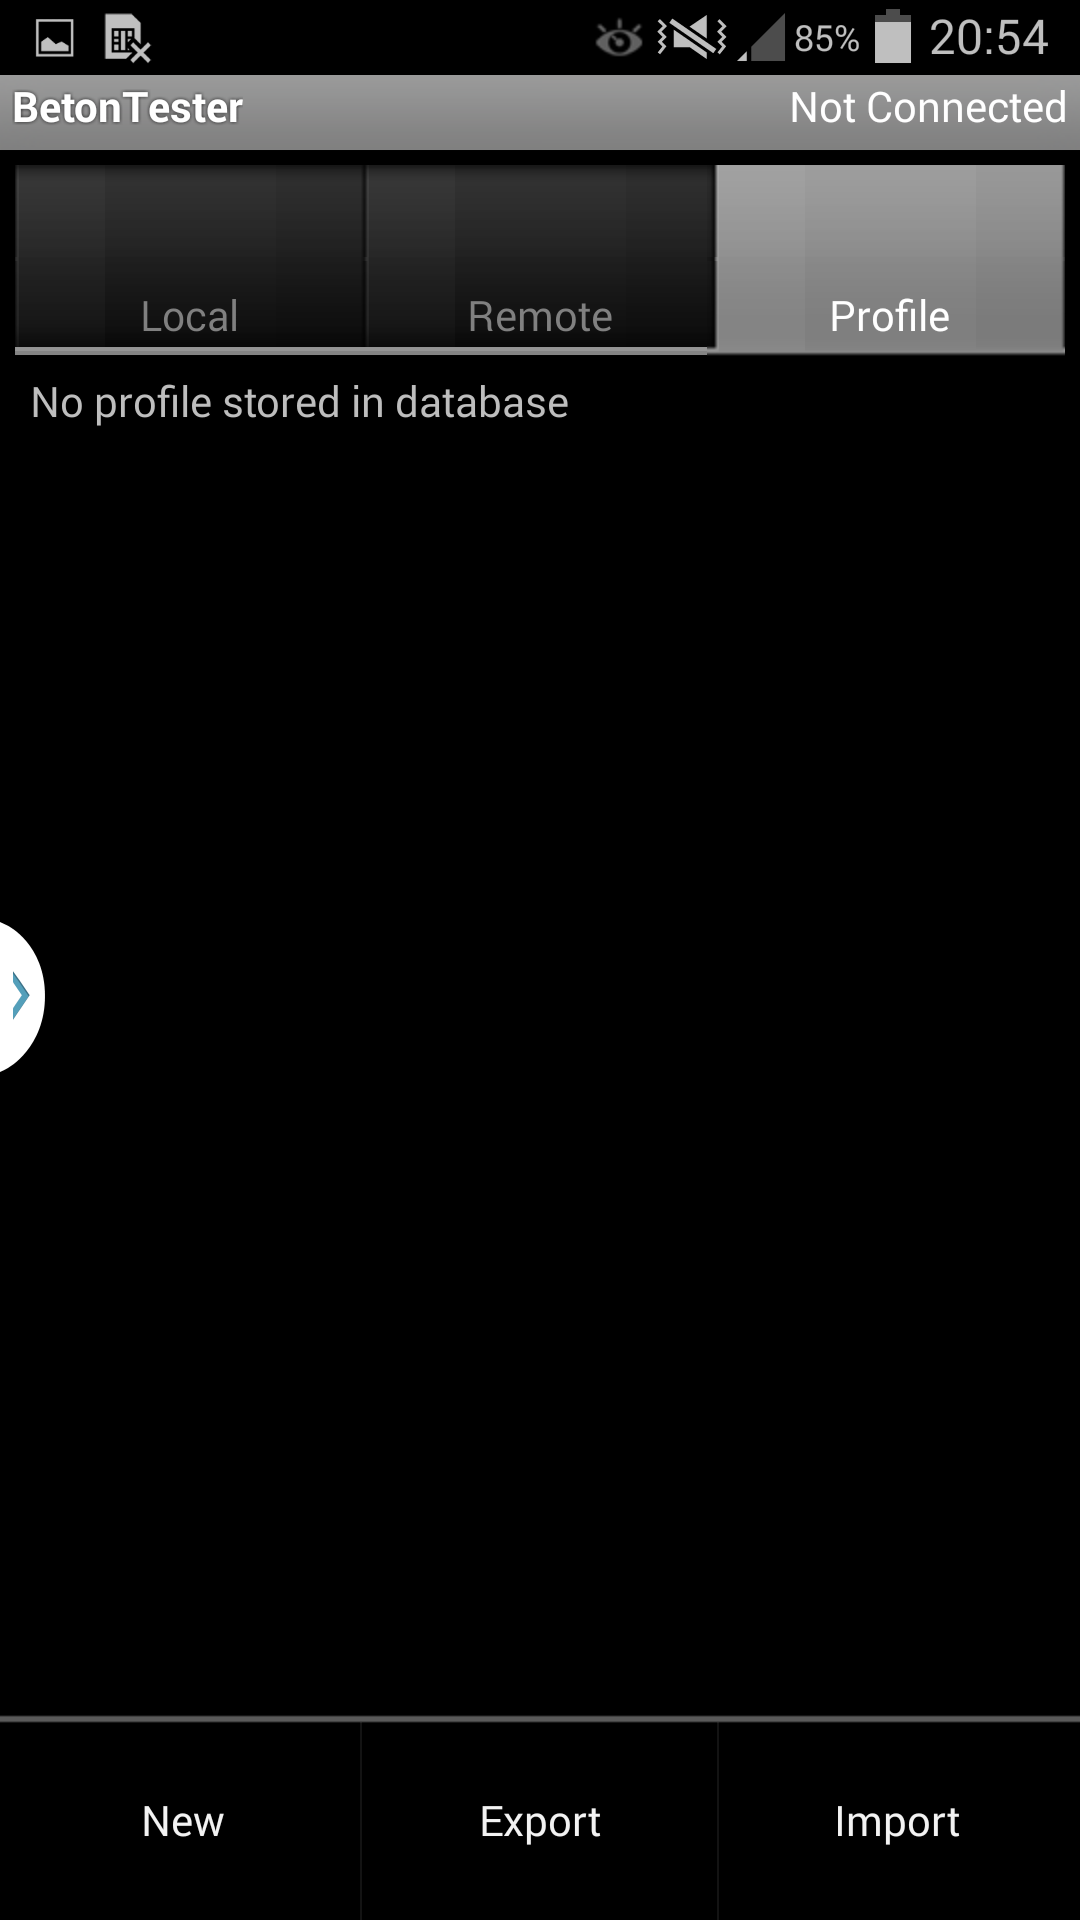
Tap to the BetonTester icon on the smartphone to open the application. There are three tabs
LOCAL - for the imported measurements stored in the internal database of the smart phone app
REMOTE - for the remote control of the eBT-2 over the Bluetooth
PROFILES - for the creation and management of the speed profiles
By switching to the REMOTE Tab the app will try to connect the eBT-2 by Bluetooth and read the headers of the measurments (if existing).
If the Bluetooth is not enabled, the app will ask the user to enable it ("Bluetooth permission request" window). When the connection is established, the blue LED "BLUETOOTH" on the eBT-2 is lightning constantly.
Requirements for a smartphone:
Any smartphone with Android 2.X and higher and integrated bluetooth transceiver can be used.
The eBT2 smart phone app is a non-Market app. To allow installation of non-Market apps on other smart phones then delivered, please enable "Unknown sources" on your Android.
Placing the batteries into the eBT-2
The eBT-2 is operating with a rechargable battery pack (NiMh 7,2 V -
4600mAh or LiPo 14,8V - 4600mAh). The accu pack is inserted on the top of
the device.
Attention: After placing the accu pack, make sure that the lid is waterproof mounted!


The eBT-2 is saving measured data and settings during accu pack change. The rechargable accu pack is good for appr. 20 measurements.
The within the eBT-2 integrated real time clock is running for min. 30
days without batteries.
Before you start a measurement, we advice you to control the battery
status using the smart phone (see Control of the eBT-2 battery
status).
Accu pack warning:
Control and setup of the internal clock
of the eBT-2
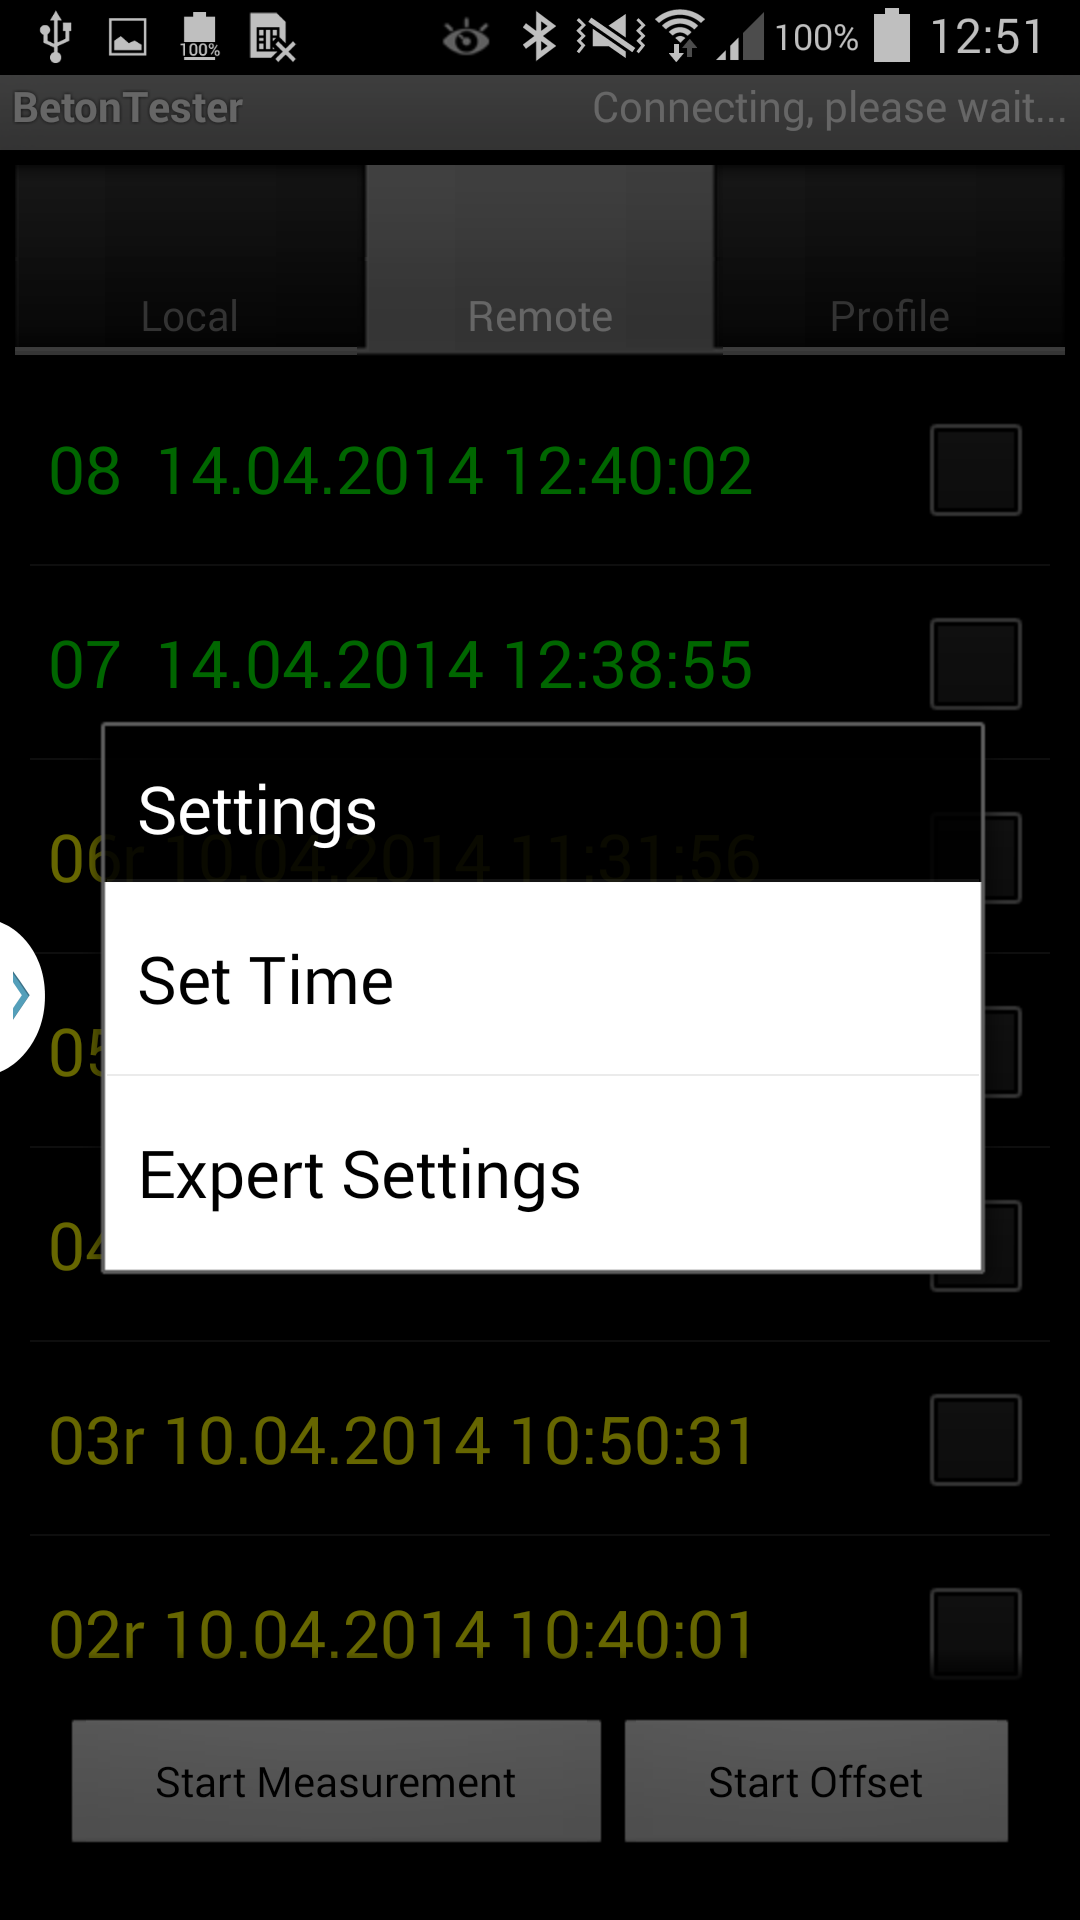
Open the app BetonTester, choose the REMOTE tab, tap the
Menu button (left down corner) and tap the command Status.
Just a few seconds later you receive information about the actual
settings of the eBT-2 on the smartphone display. The difference between
the internal clock of the eBT-2 and the smart phone should not be bigger
than one minute. If the difference is bigger set the clock by using the
command Set Time.
For more setups see chapter 7. Setup.
Control of the eBT-2 battery status
Within the eBT-2 program at the smart phone select the tab REMOTE.
Open the menu, tap the command button Status.
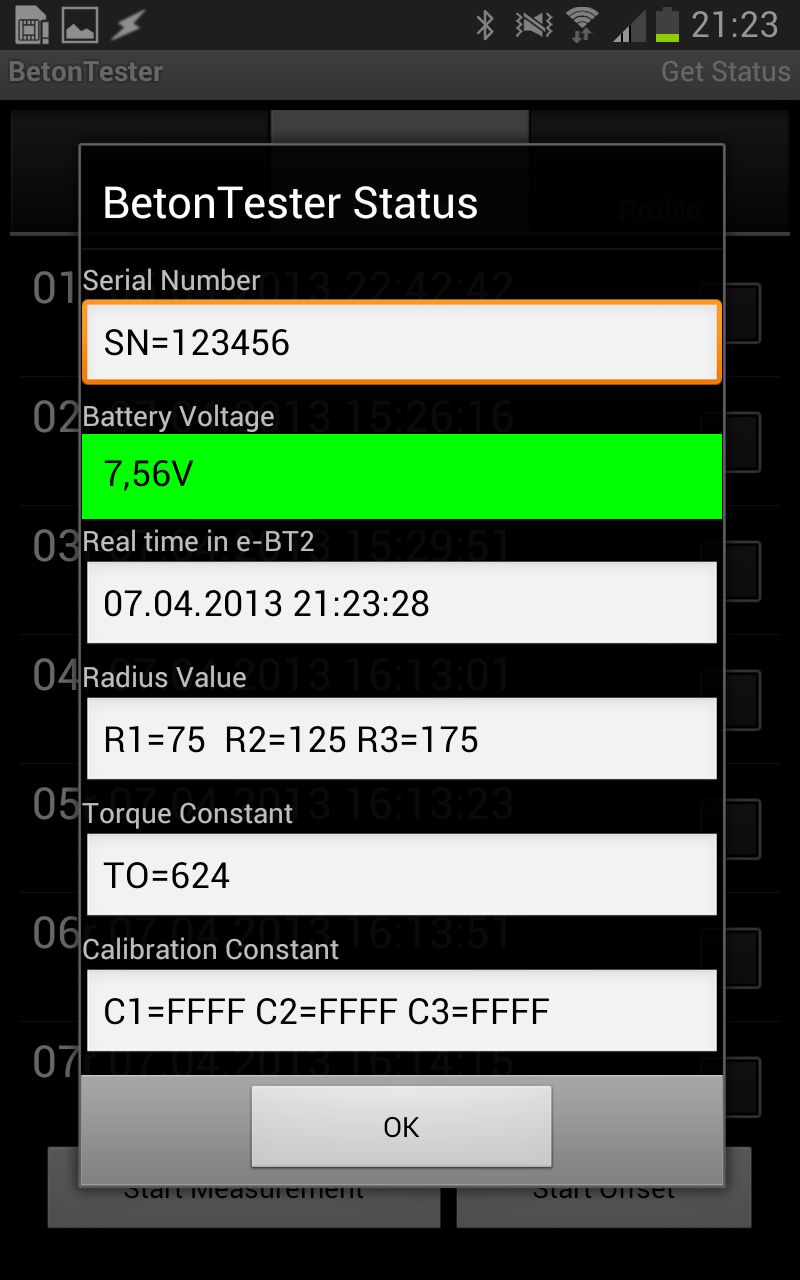
After the end of the data transmission the smart phone displays all data
sets actually saved on the eBT-2 as well as the actual value of the supply
voltage of the eBT-2 in the form Battery voltage=7,56 V .
NiMH accu pack - 7,2
V:
The value should be higher than 7,5 Volt (green backgroung) if a longer
series of the measurements is planned.
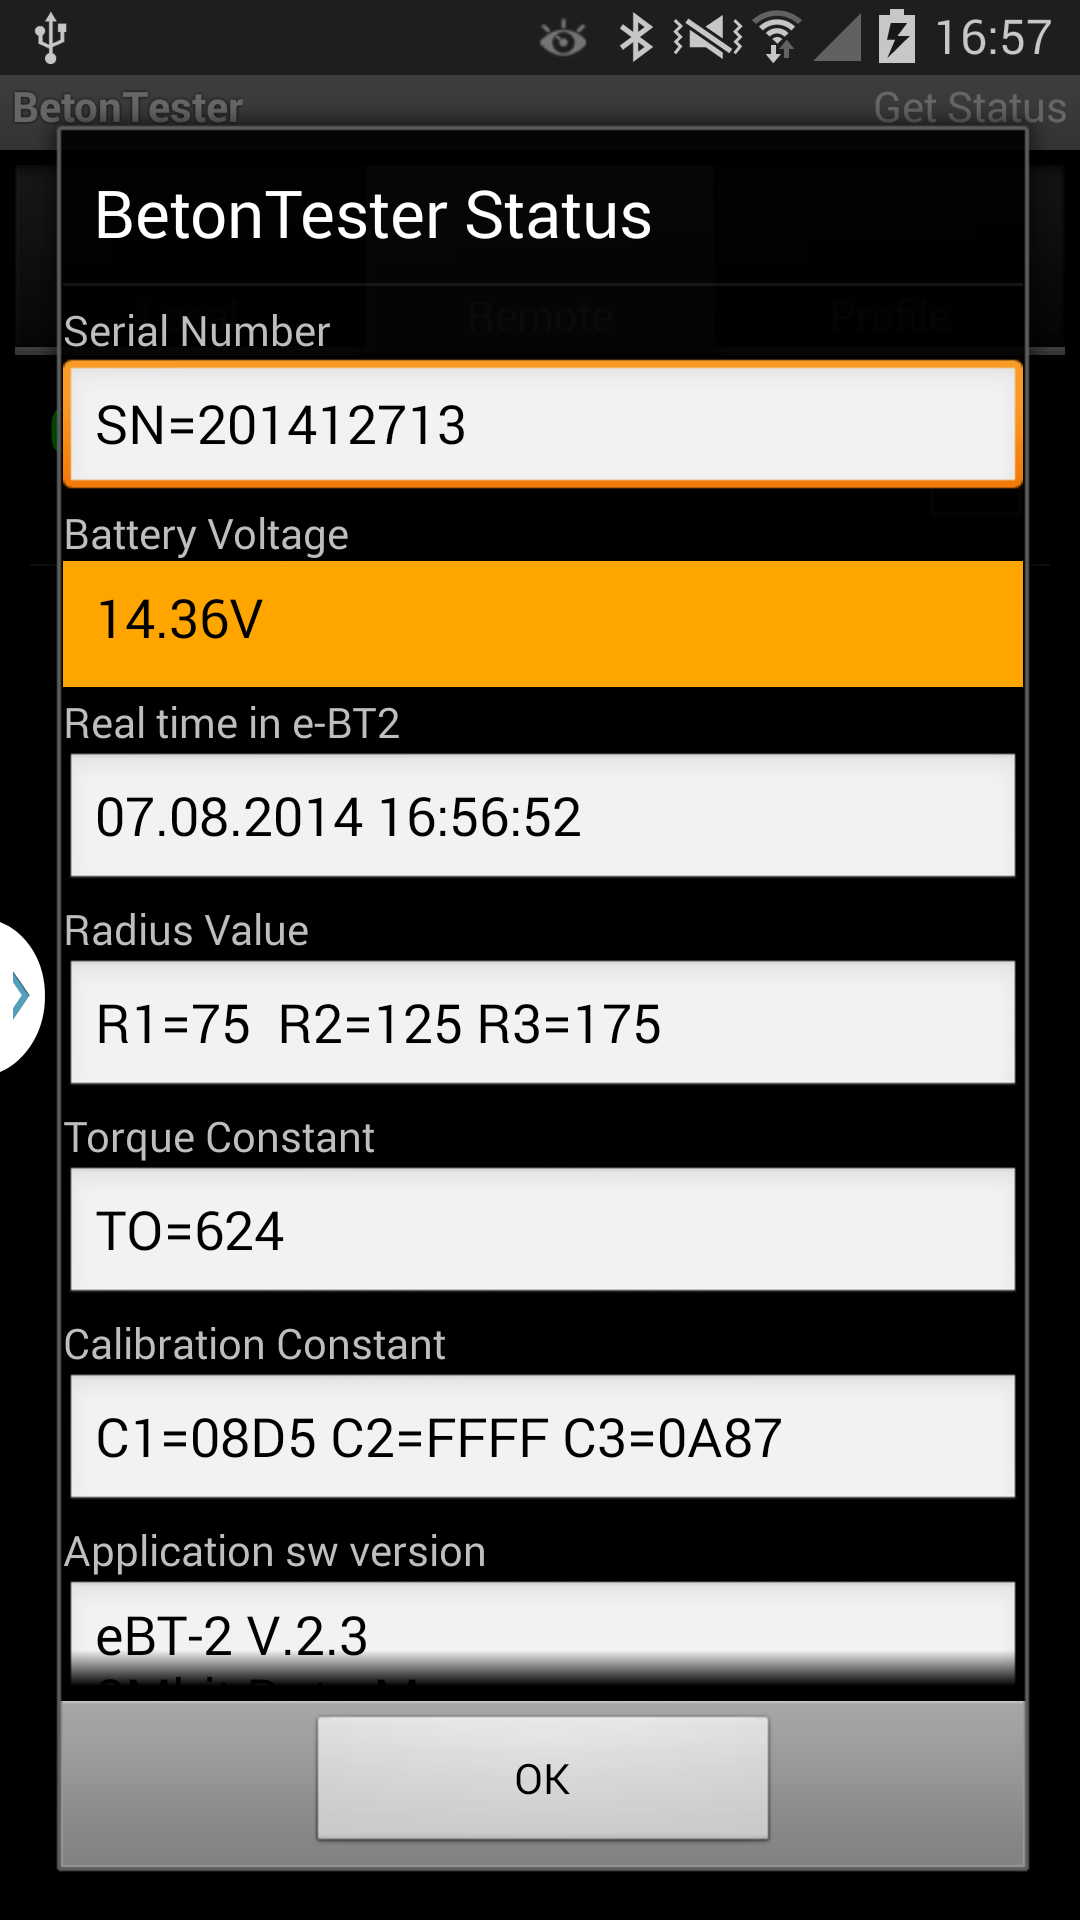
If the supply voltage is lower than 6 V (red background), change the accu
pack immediately.
LiPo accu pack - 14,8
V :
The value should be higher than 14,5 Volt (green backgroung) if a longer
series of the measurements is planned.
If the supply voltage is lower than 14 V (red background), change the accu
pack immediately.
If the eBT-2 is switched on, the supply voltage is checked every two minutes.
Bluetooth
The eBT2 can be connected only with one smart phone at the same time.
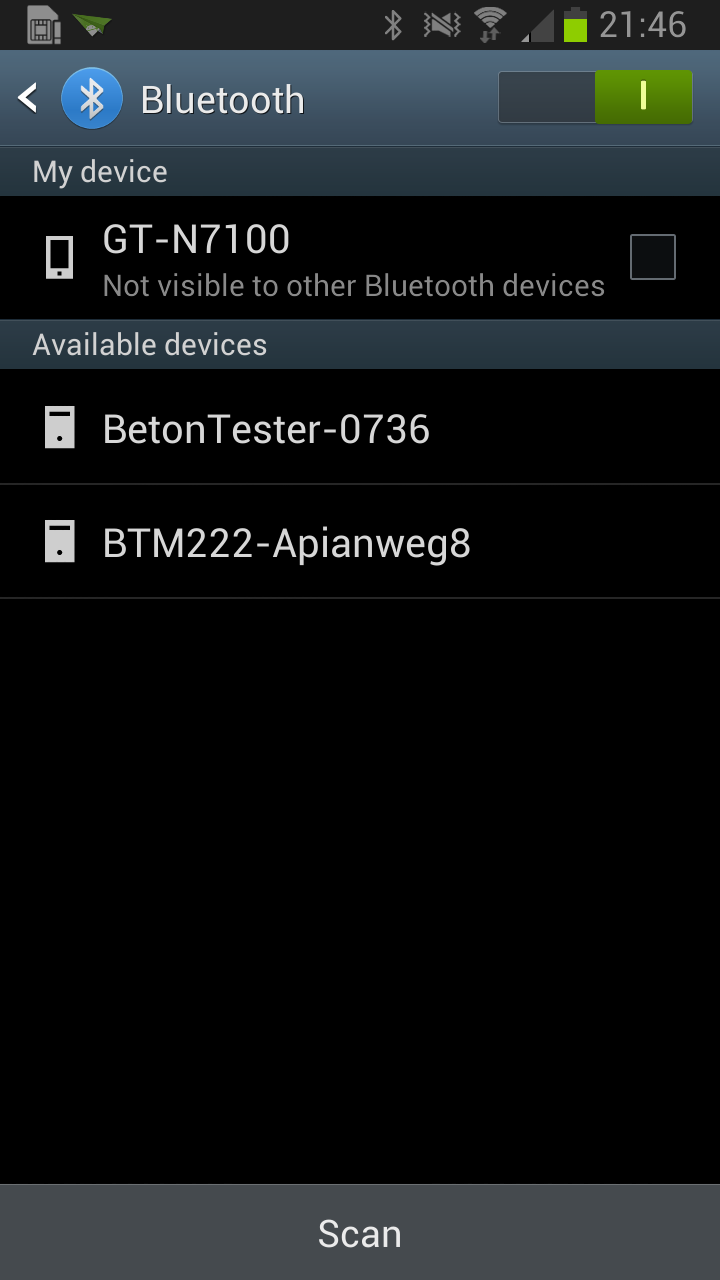
To activate Bluetooth, on the Applications screen, tap Settings -> Bluetooth, and then drag the Bluetooth switch to the right.
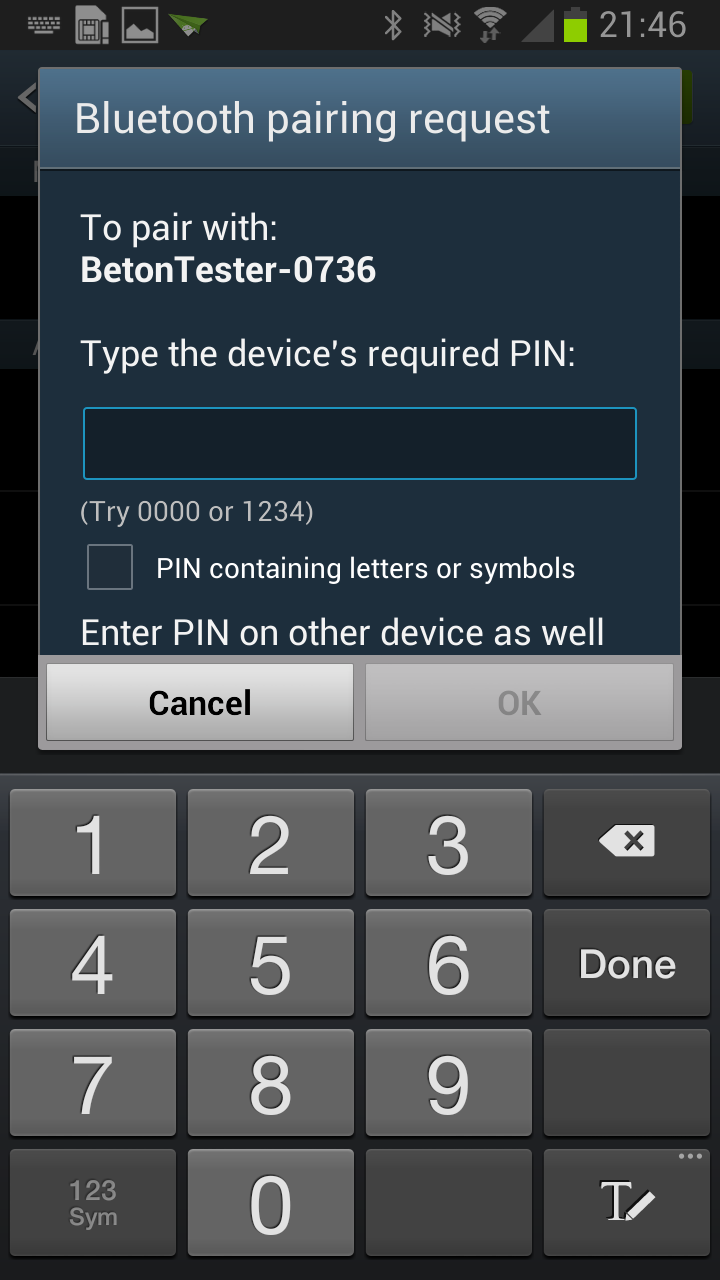
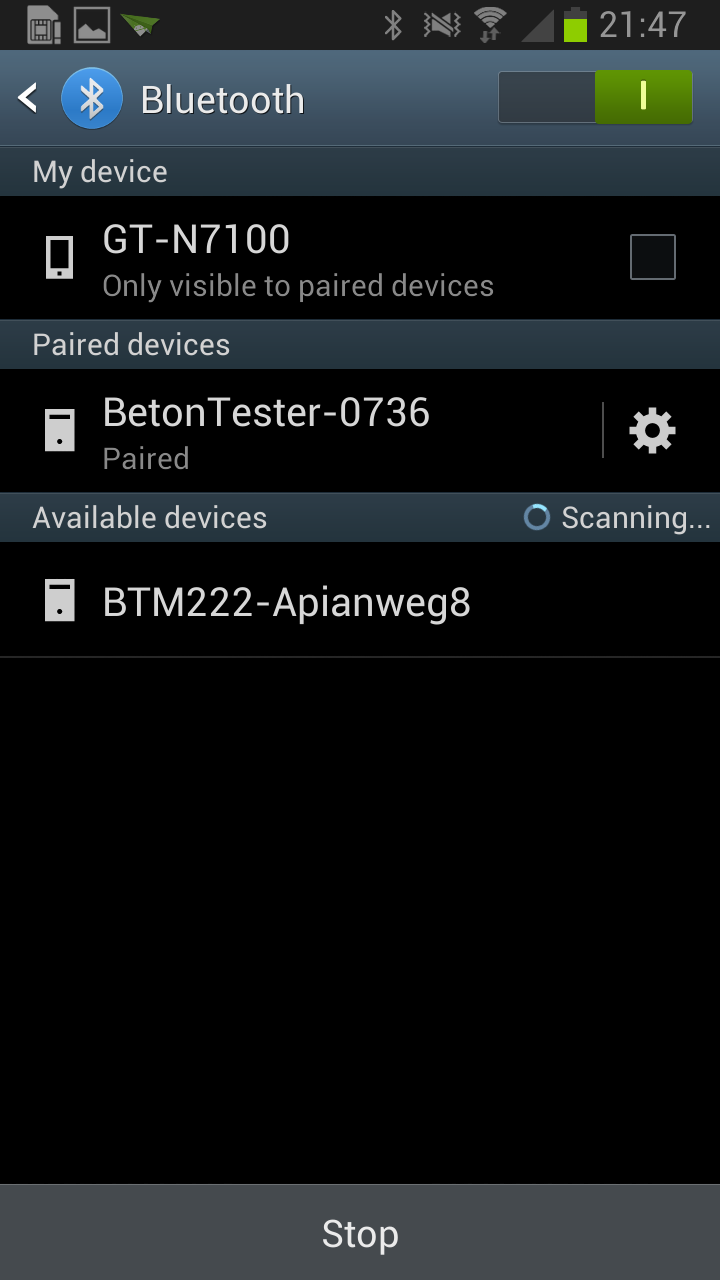
Pairing with other smart phones:
On the Applications screen of the smart phone , tap Settings -> Bluetooth -> Scan, and detected devices are listed.
Select the device "BetonTester-XXXX", and then enter the required PIN= 1234
For the power-ON push the red button on the top. The green LED "READY" is blinking, the blue LED "BLUETOOTH" is also blinking (faster). The eBT-2 is now ready for use.
You can switch off the eBT-2 by pressing the red button.
The eBT-2 is going to power save state after 20 minutes without activity. Restart is possible by switching the red button off and on.
| LEDs | Notation | off | blinking | on |
| LED - green | READY |
power off |
power on
not offset |
power on offset is done eBT2 ready |
| LED - red | WORKING | offseting or measurement in progress | ||
| LED - blue | BLUETOOTH | eBT2 ready | connected |
In a pot with fresh concrete (fig. 1) is a shaft centered and vertically
positioned. The eBT-2 is sticked on it horizontally. The eBT-2 got two
probes. In the measurement unit are integrated a sensor for the angular
velocity, for each probe a sensor for the momentum against the turn
direction as well as a data logger with bluetooth port.
The data of each probe under consideration of angular velocity and the
distance to the shaft are worked into the flow curve. Due to the fact of
the three radii the momentum is simultaneously measured at two resp. three
flow speeds. Pro rotation are appr. 100 angular velocities and also
100 momentums per probe recorded. Fresh concrete is like a bingham fluid.
The flow curve is therefore a straight line and can be determined by
regressive calculation. After the measurement the data sets are wireless
transfered to a smart phone, there the measurement results can be
graphical displayed and short term saved. From the smart phone an easy
transfer to a PC for further analysis is possible.
To detect flow curves of concrete up to now it was tryed to measure the shear stress at different speeds, which required more than one rotation. Problems like segregation and structural breakdown during the measurement could not be avoided sometimes. Here we come to the advantages of the eBT-2. Because of the fact, that the eBT-2 is measuring two resp. three speeds at the same time, one rotation of the measurement pot is enough. It isn't measured two times at the same place in the fresh concrete.
Put the protection sleeve on the shaft. Depending on the used pot approximately 40 or 20 liter of fresh concrete are filled in to the upper edge of the measuring pot, condense the material by hand with some soft knocks and smooth it down with a batten. Take care, that the upper part of the axis after removing the protection sleeve is not made dirty with concrete.
Switch on the eBT-2 device with the red button. After a few seconds the green LED "READY" is blinking.
The job or program to be performed by the eBT2 is defined in a so called
profile. The profile defines the rotation velocity of the device. Each
profile can contain up to 8 segments.
A segment specifies how long (angle) the device has to rotate and the
velocity at the beginning and end of the segment.
With a different velocity at the beginning and end of the segment you can
assign the slope of the velocity (ramps).
Example:
A simple ramp from 0°/sec at begining to 20°/sec. at half of the turn (1. segment) followed by a ramp from 20°/sec to 0°/sec at 360° (2. segment) has to run as follows:
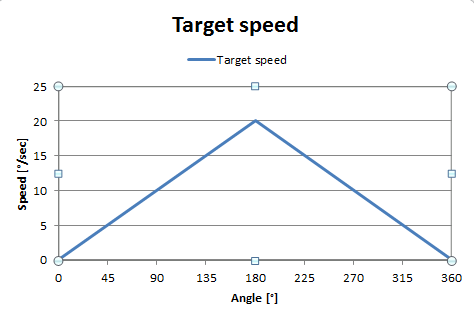
The idea on the picture above can be tranformed to the following table:

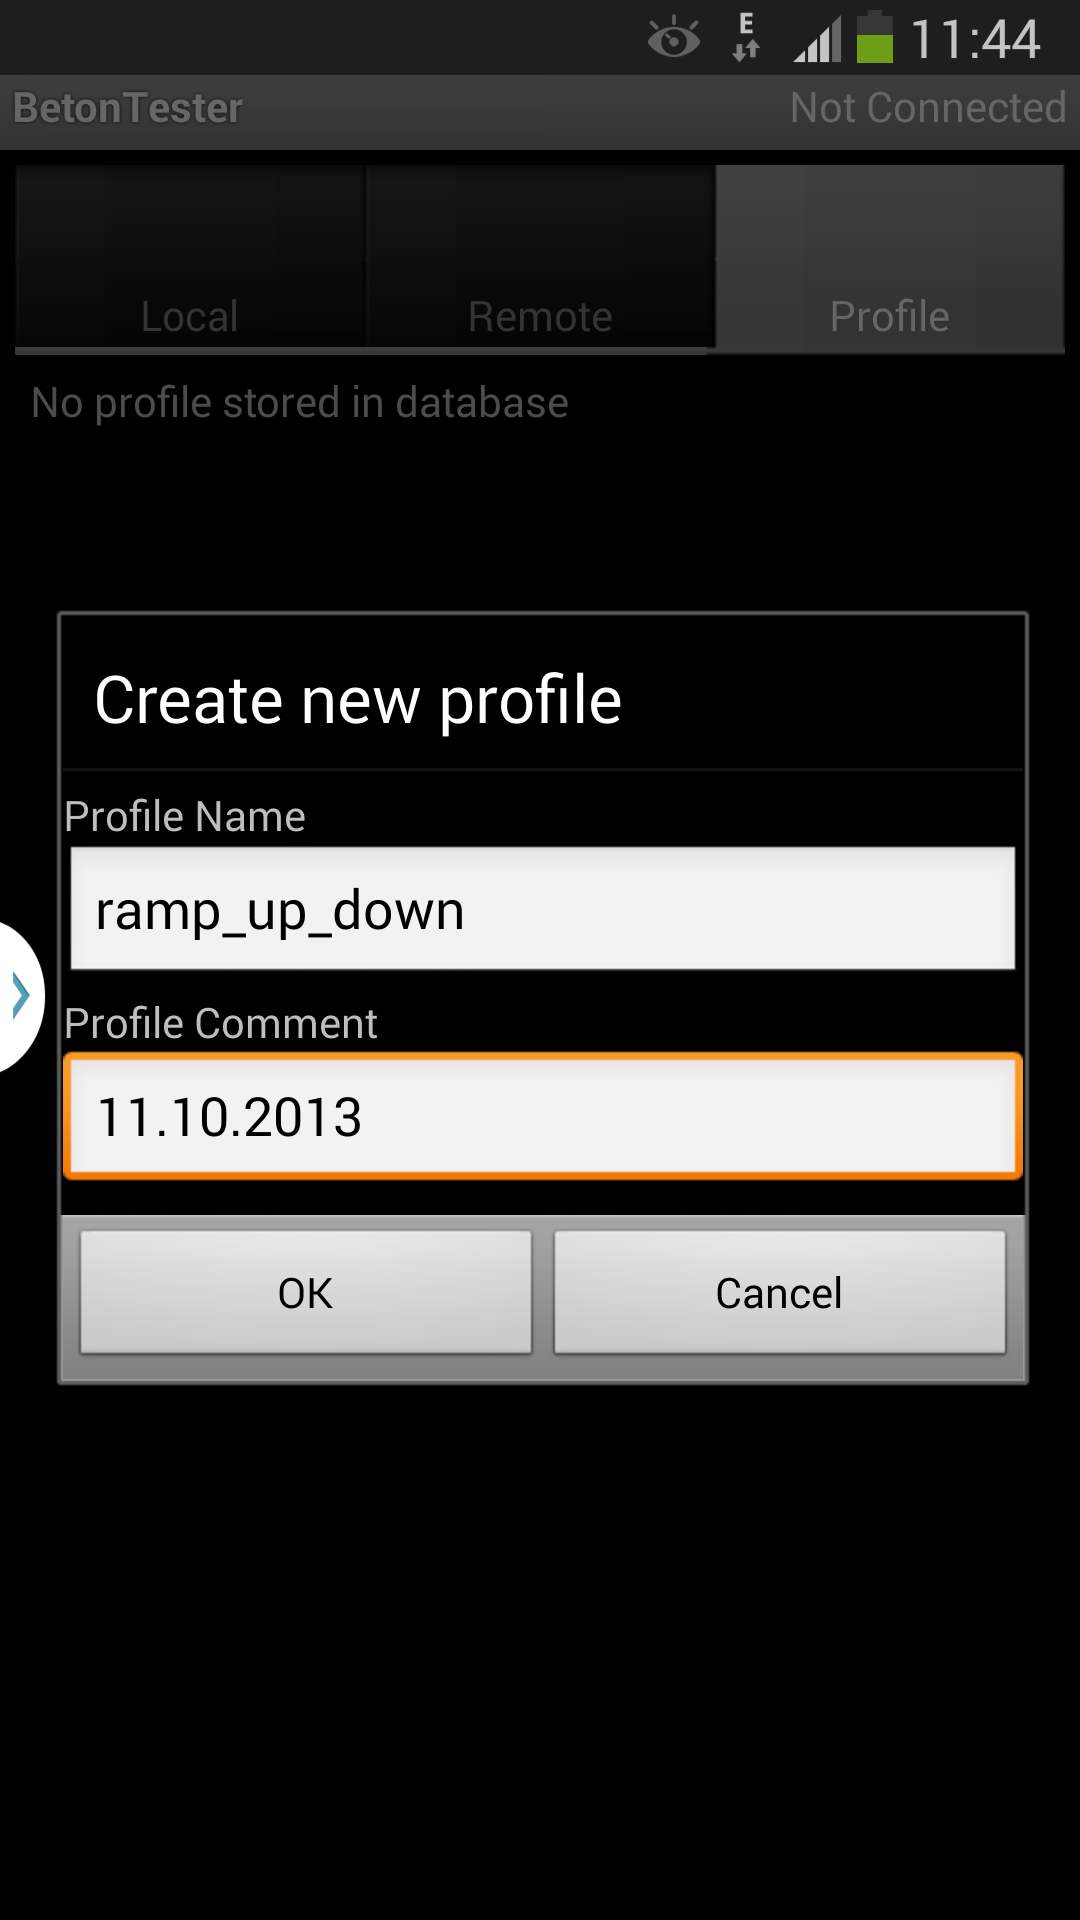
To create a new profile change to the PROFILE tab and tap to the MENU. Chose "NEW"
| Create a new profile | Create a new profile | Create a new profile | Create a new profile |
 |
 |
 |
 |
|
Go to "Profile" tab;
tap on the "New" button
|
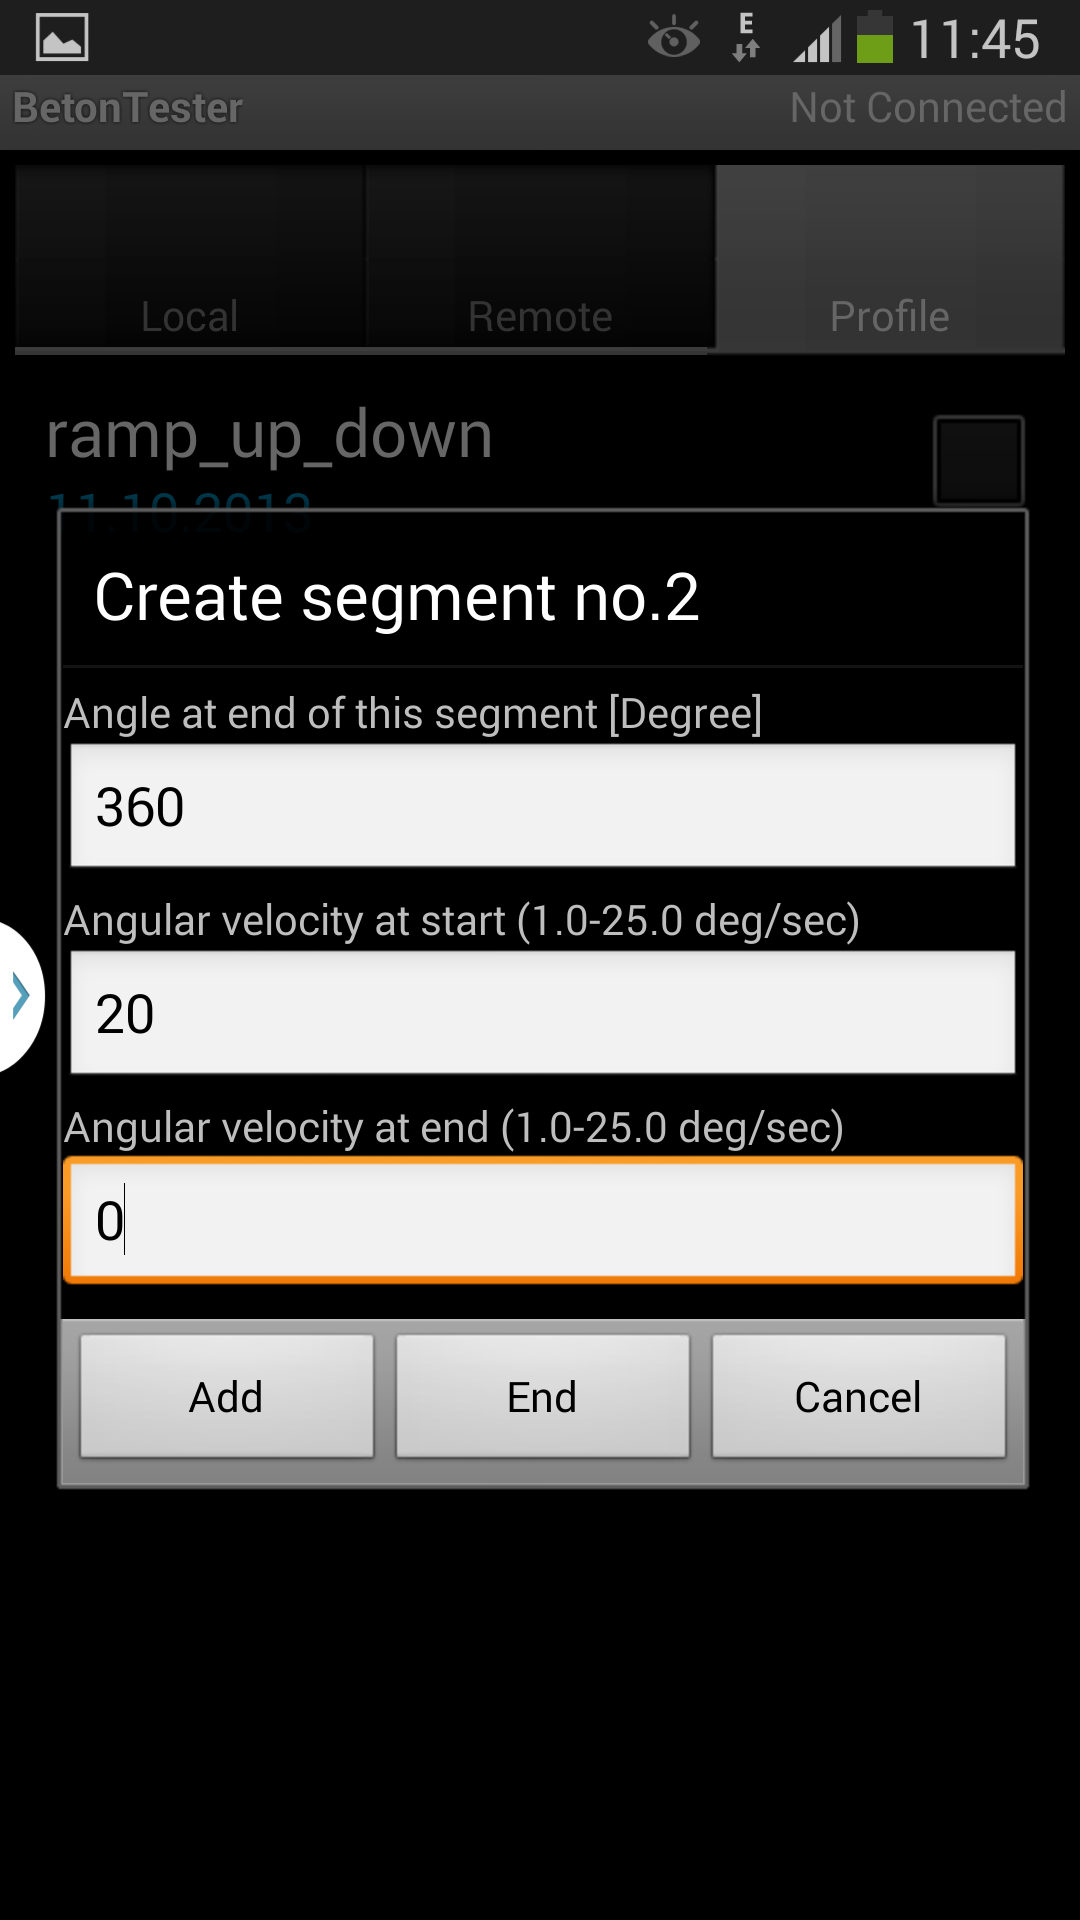
Enter a name and optionally a comment | Enter an end angle on the end of the first segment, angular velocity at start and at end of the first segment (first row from the table above) | Enter an end angle on the end of the second segment, angular velocity at start and at end of the second segment (second row from the table above) |
| Create a new profile | Create a new profile | Create a new profile | Create a new profile |
 |
 |
 |
 |
|
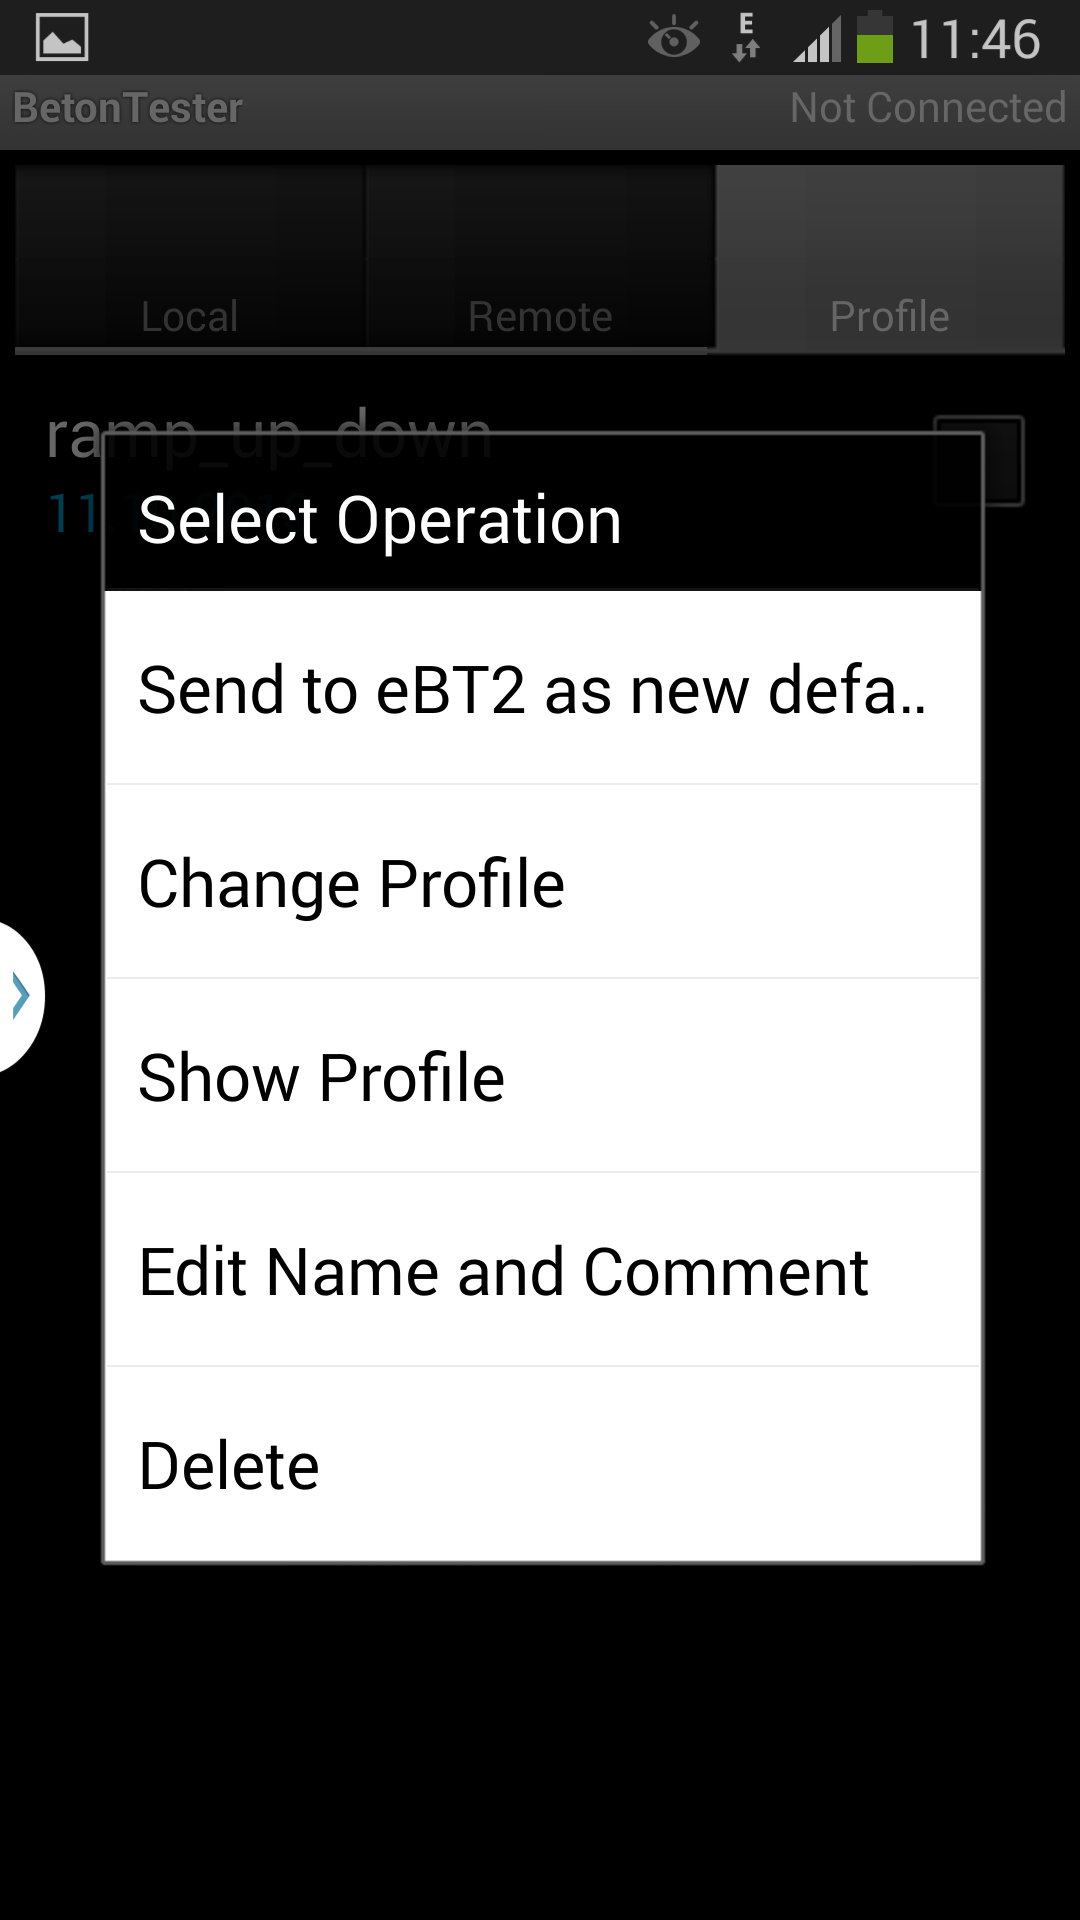
A new profile was created.
Tap on the created profile until a
profile menu appears
|
profile menu |
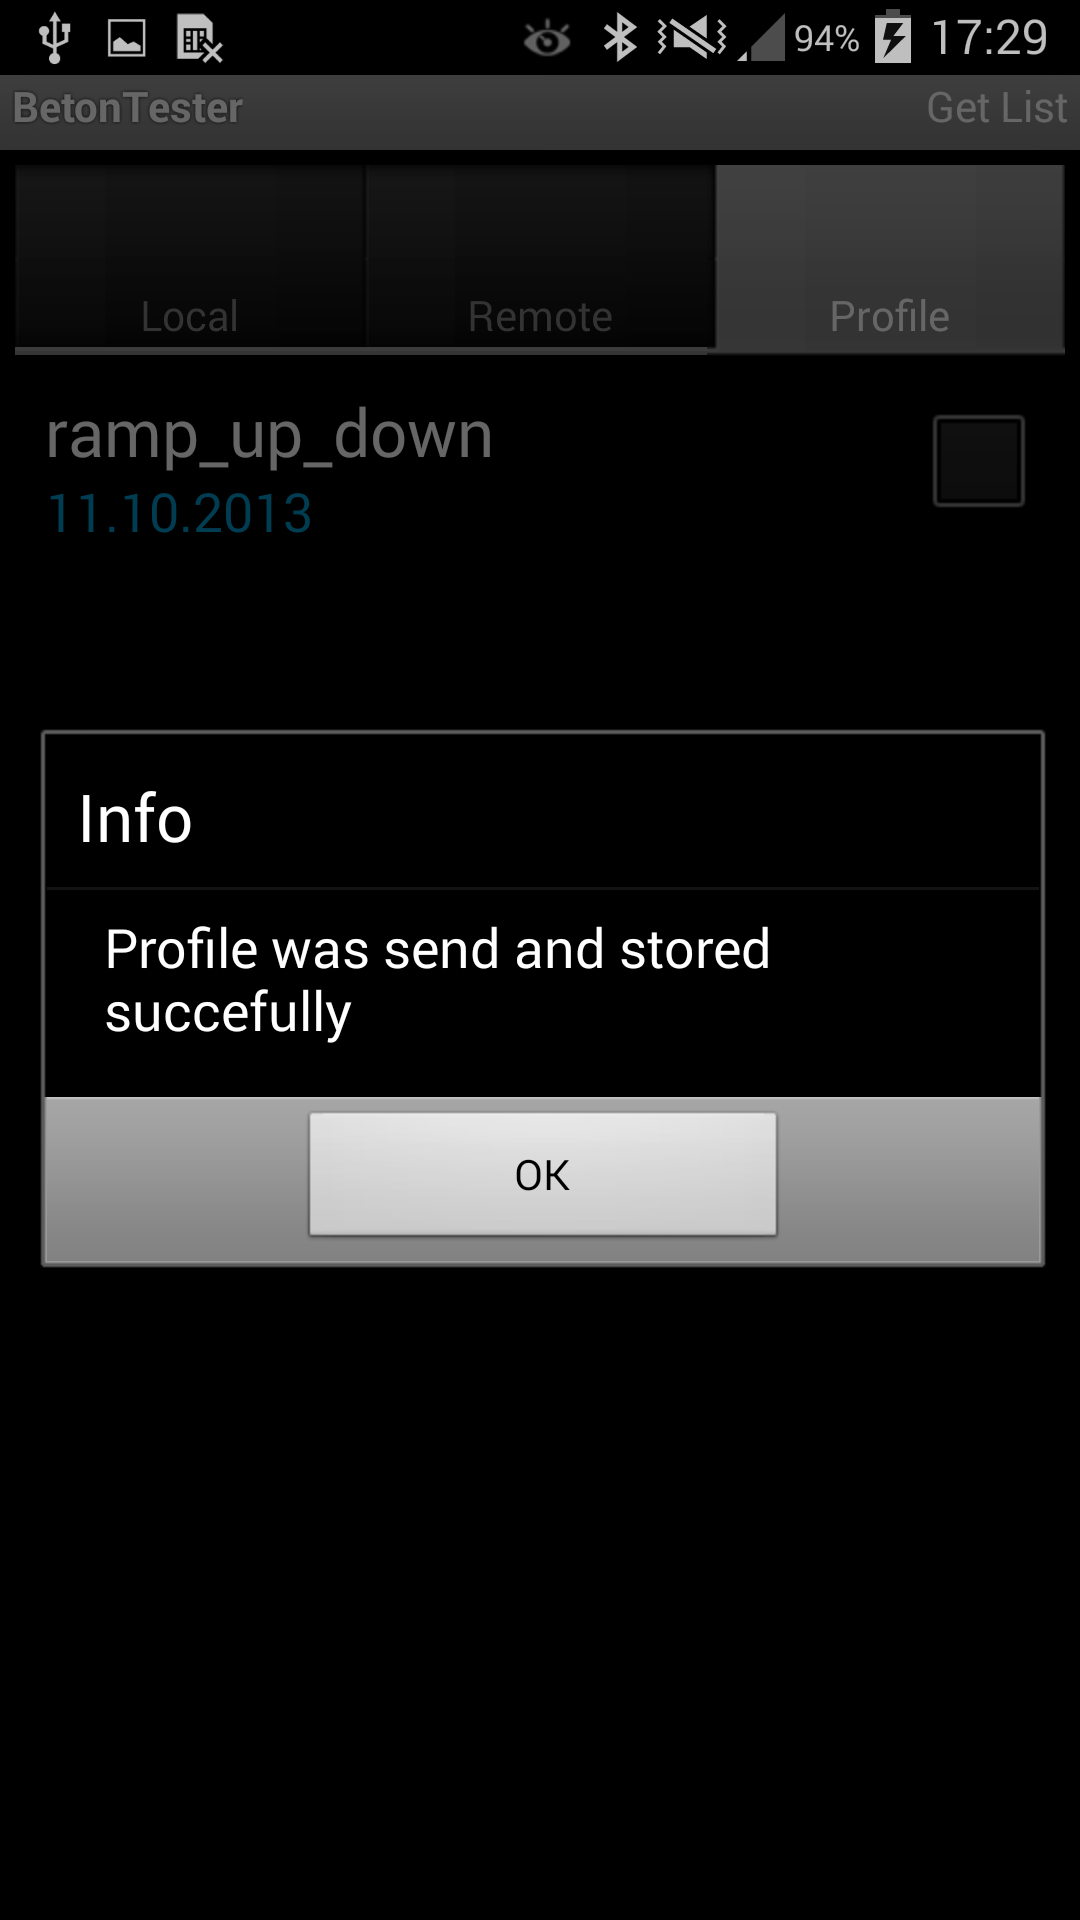
tap to "show profile" in the profile menu to check the profile curve. If the created profile is OK, you can send it to the eBT2. | Now the created profile is stored in the eBT2 and ready to use. |
Hints about creating and using the profiles
If you start a new series of measurements, it is the best to delete all prevouis measured data from the eBT-2 (assuming the are already transfered into a smartphone). See chapter 5.1 Deleting data sets from the eBT-2.
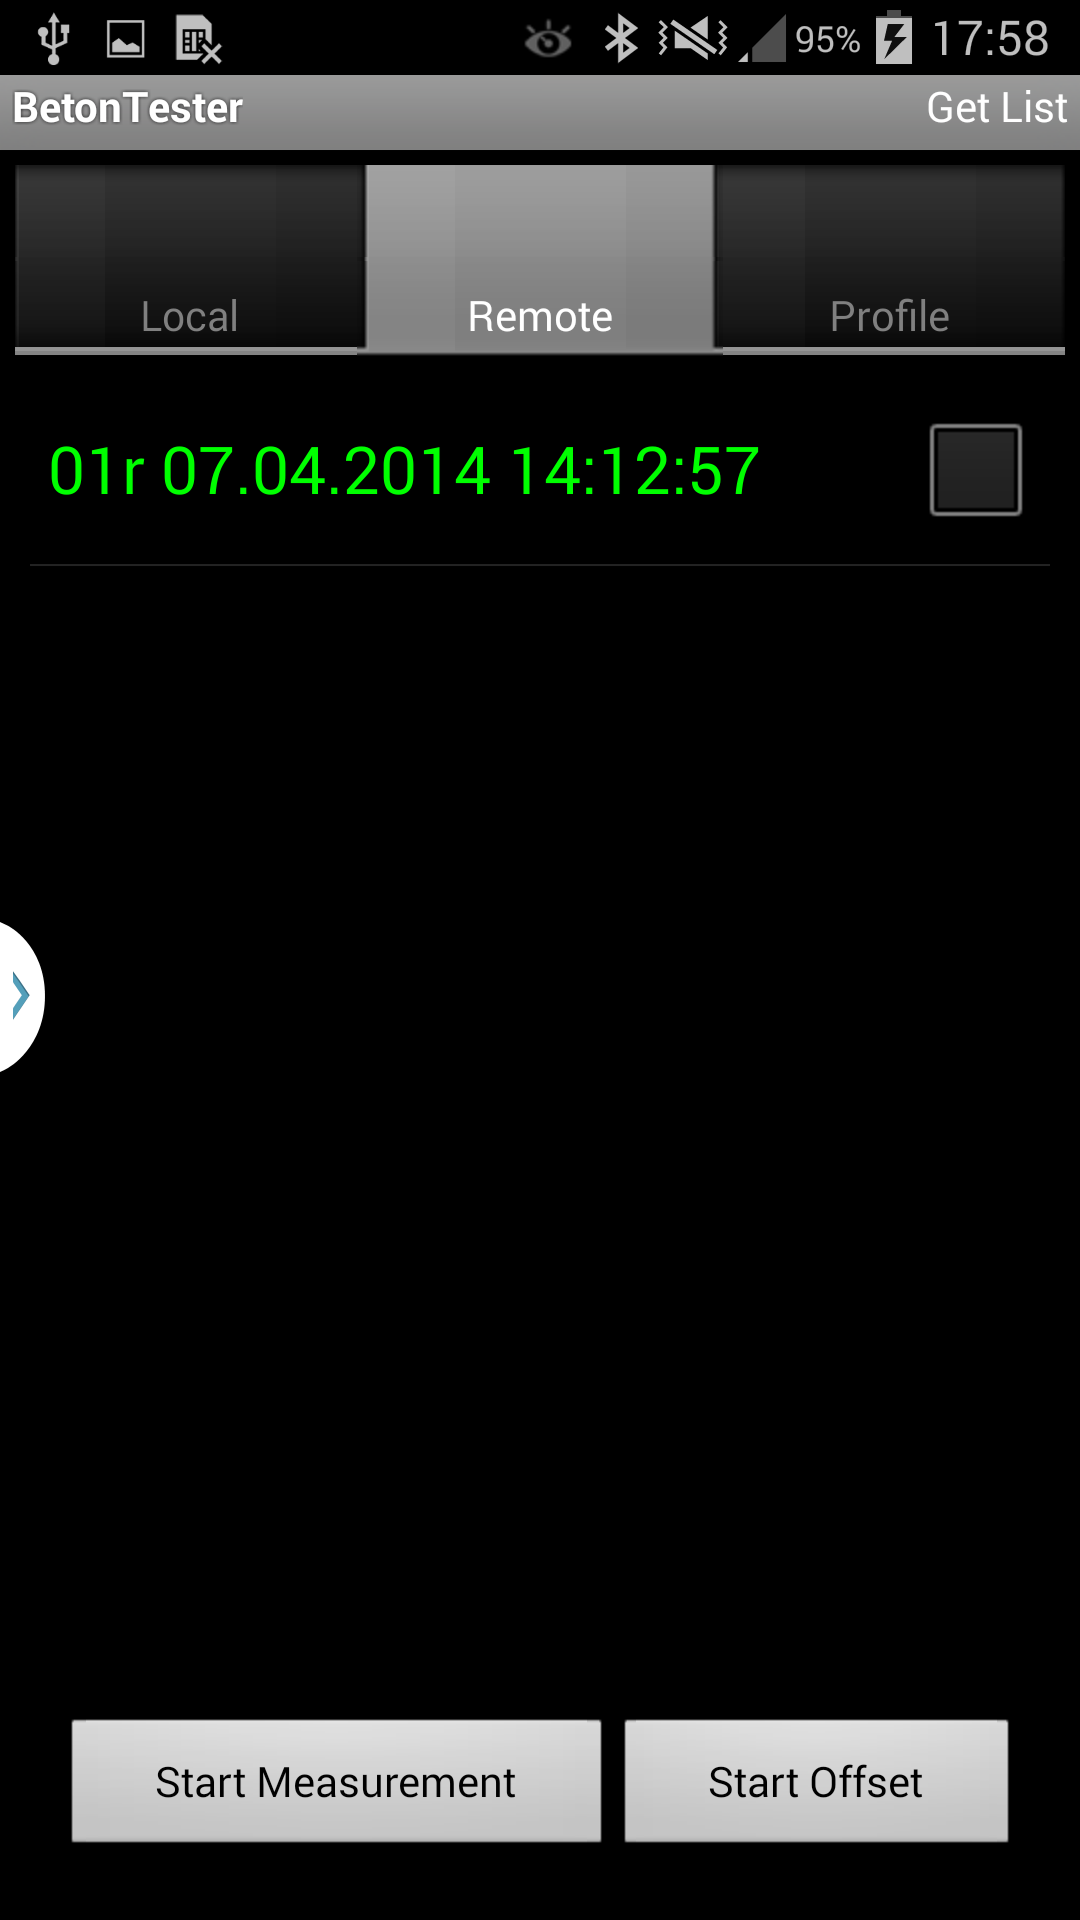
Stick now the eBT-2 on the shaft. Be sure, the offset measurement is done (green LED "READY" is still lightning).
| Start the measurement | Start the measurement | Start the measurement | Start the measurement |
 |
 |
 |
|
|
Tap on the Start Measurement button
|
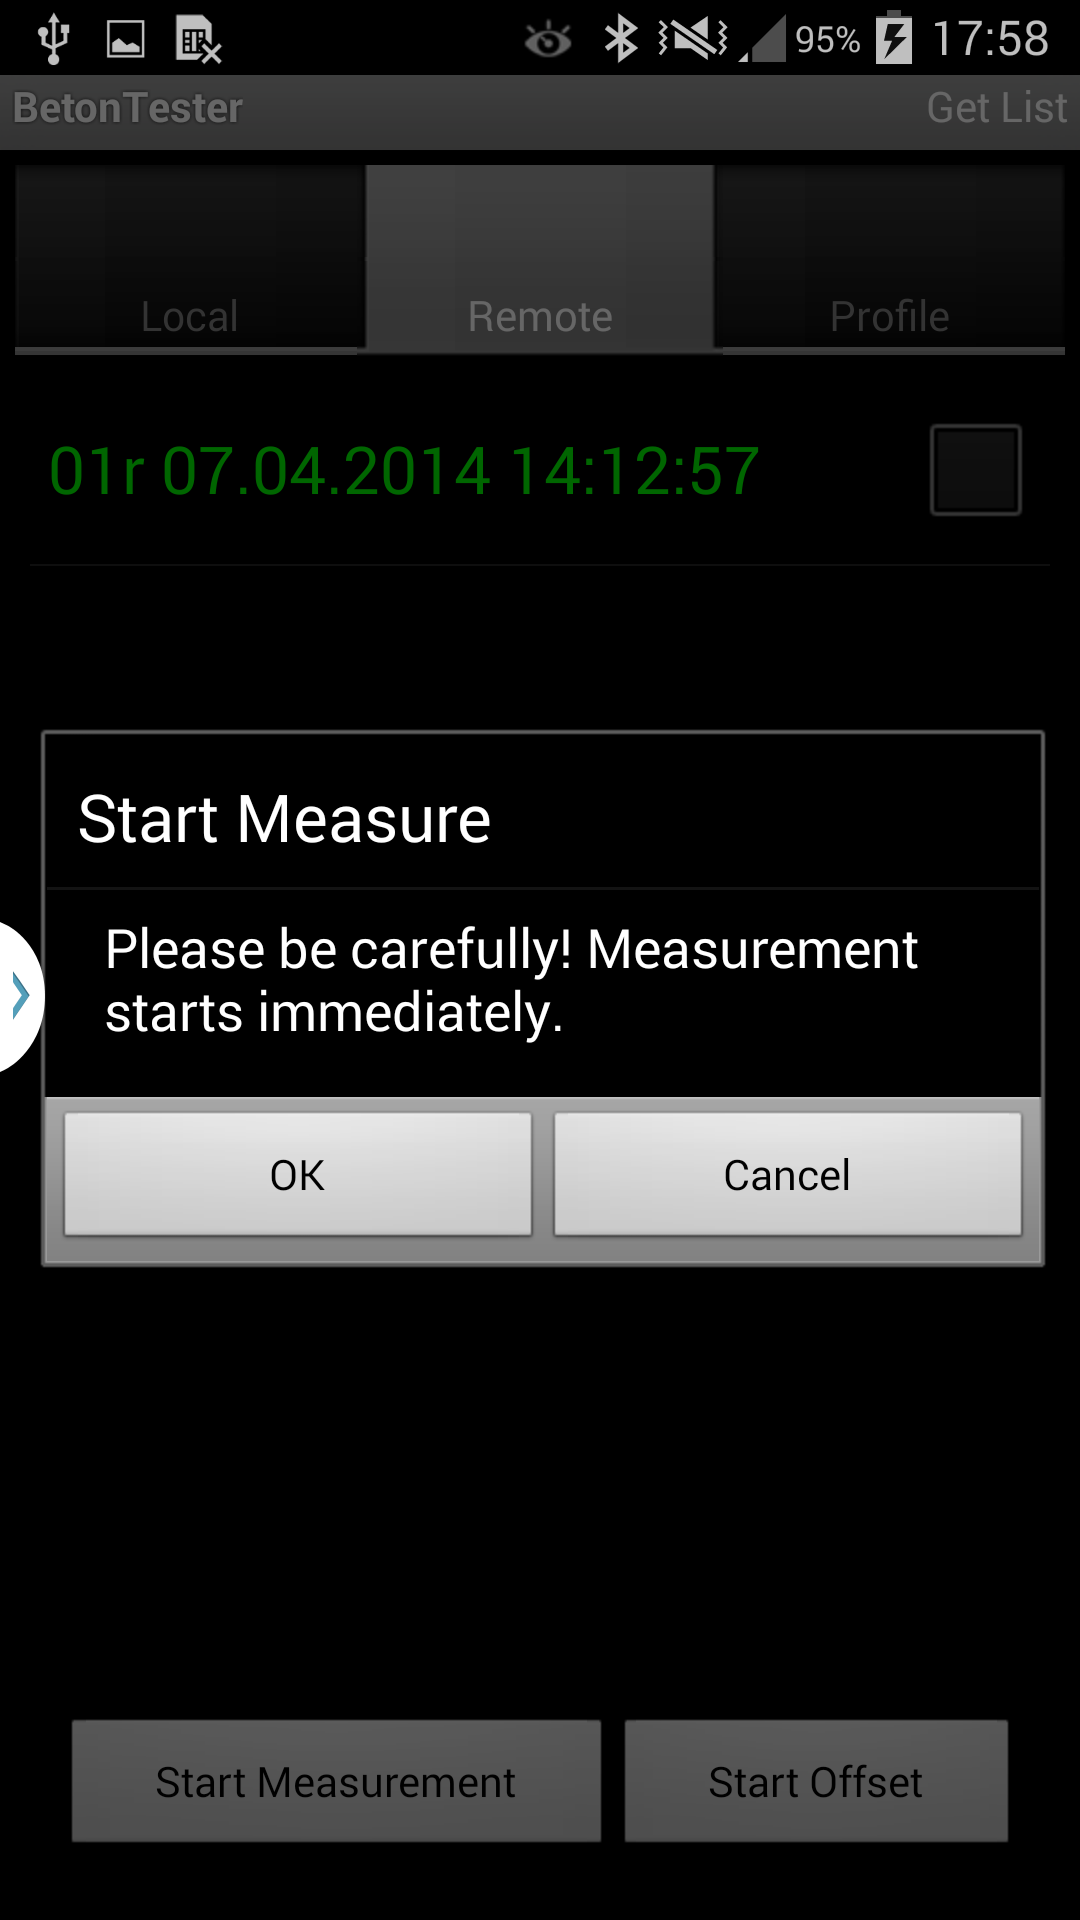
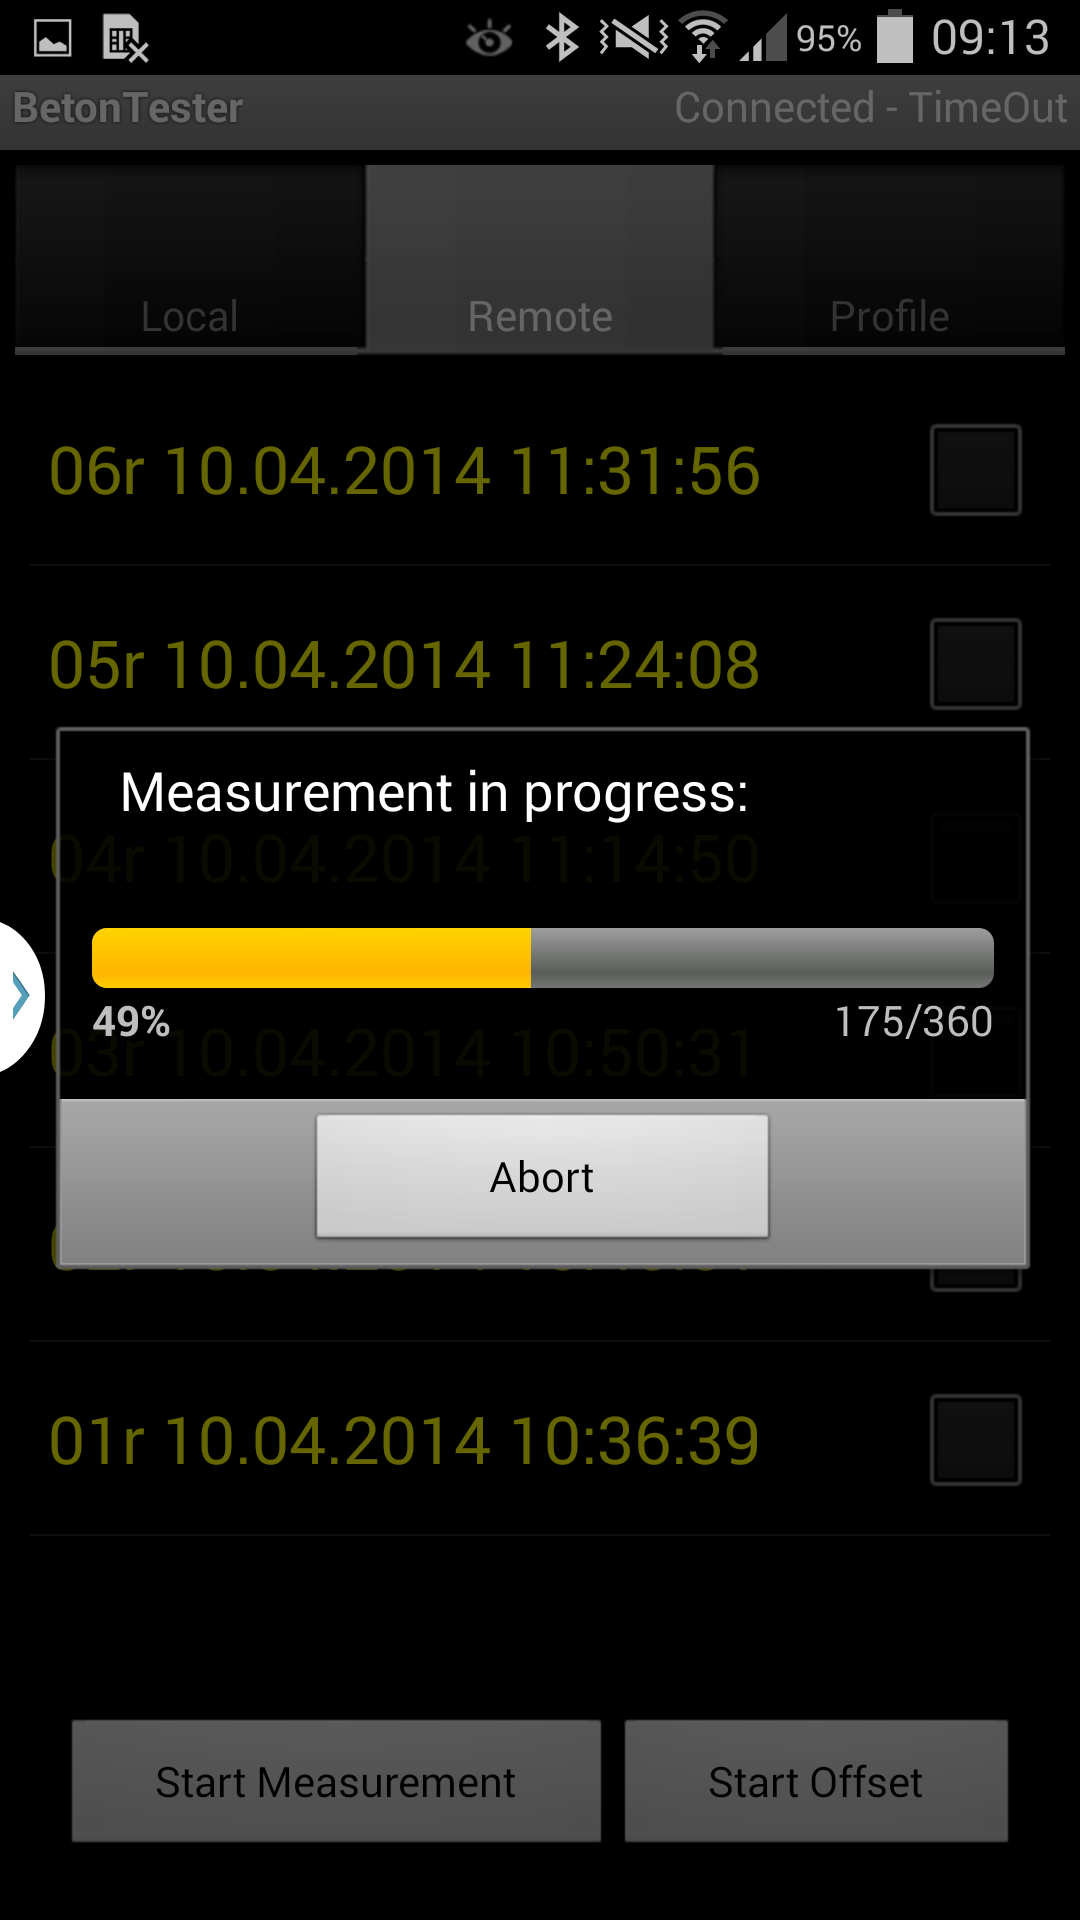
Confirm if you really ready | The progress bar shows the progres in % or in degre. You can also break the measurement at any time. |
After a masurement is finished it header (consecutive number, date and time) appears. |
The measured data are non-volatile stored in the eBT-2 device with a consecutive number, date, time and device paramater. The dataset is not transfered on the smart phone at this time. See chapter 4.6 Data transfer to the smartphone
A further measurement can be started, but before it is recommended to make an offseting.
If no other measurement or data transfer with the smartphone happens, the eBT-2 goes into sleep mode after appr. 20 minutes. All LEDs on the top are switching off.
It is recommended to clean the measurement pot and the probes after each measurement.
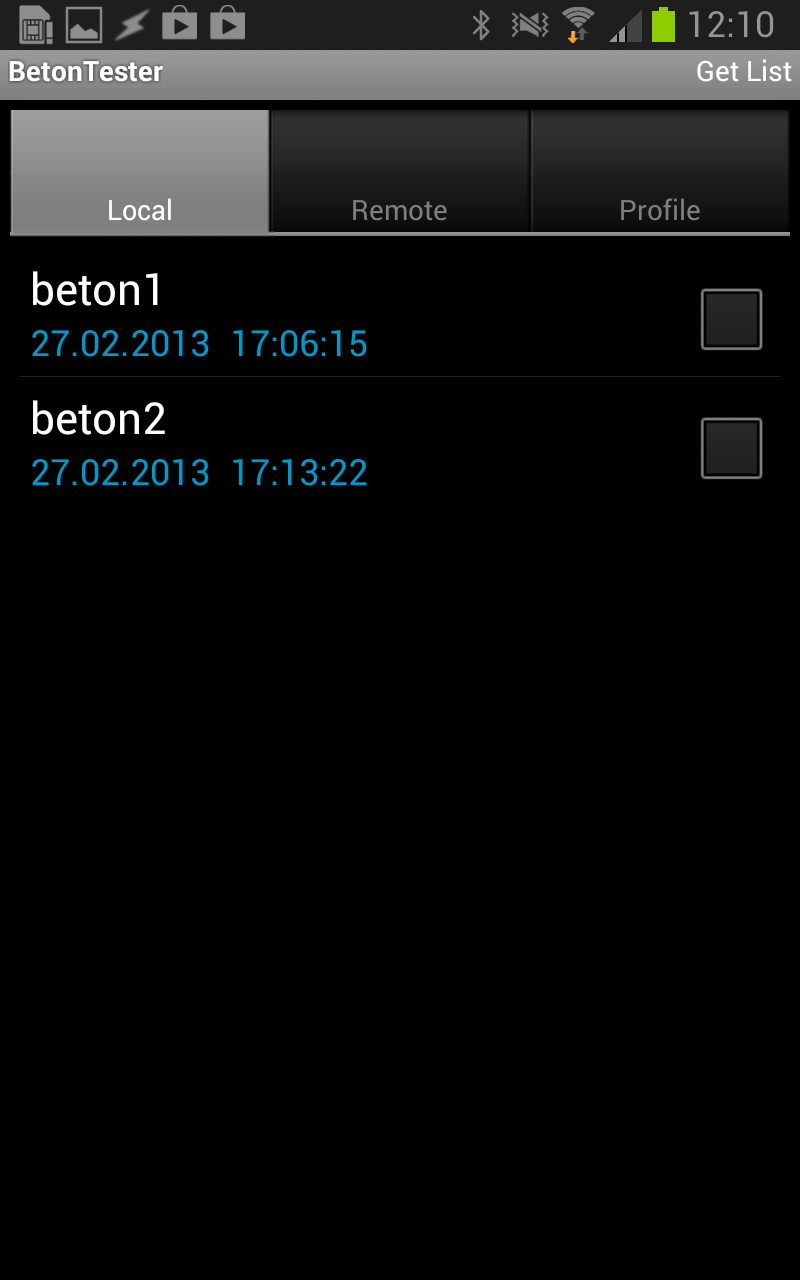
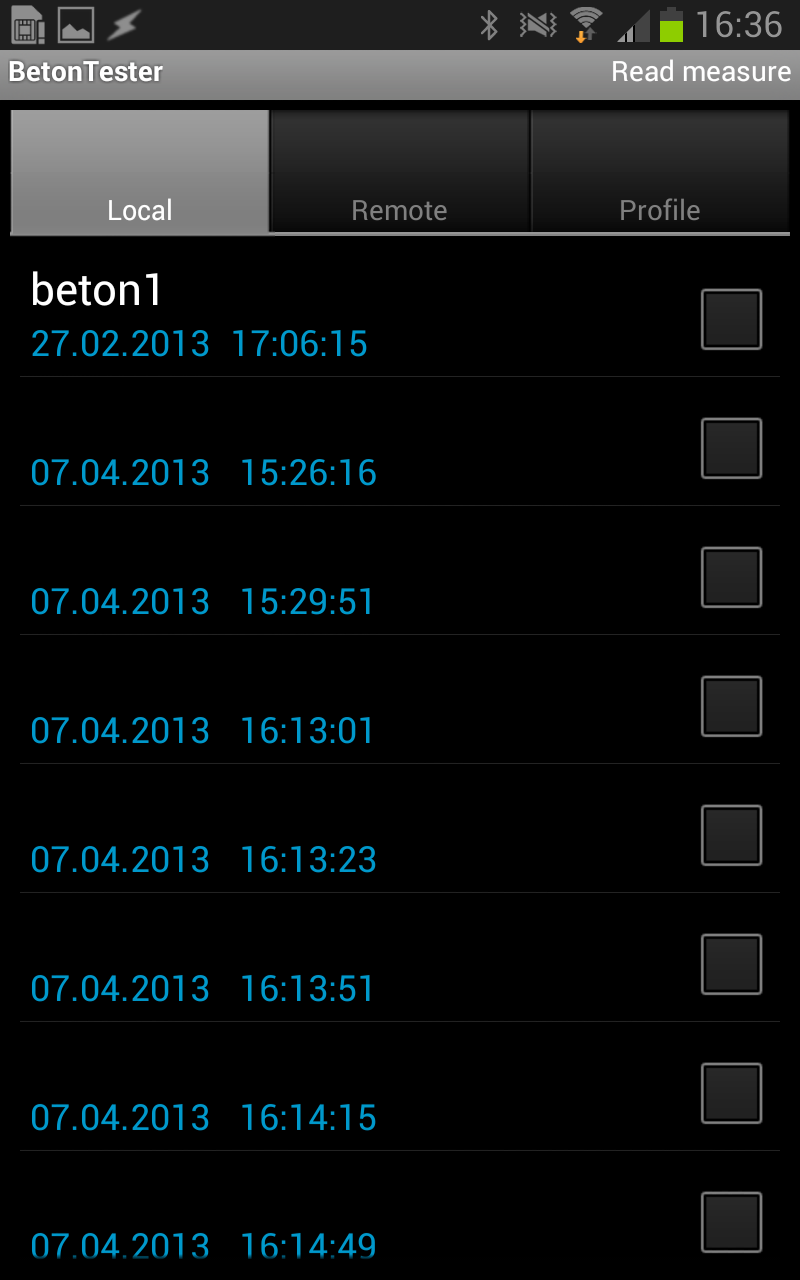
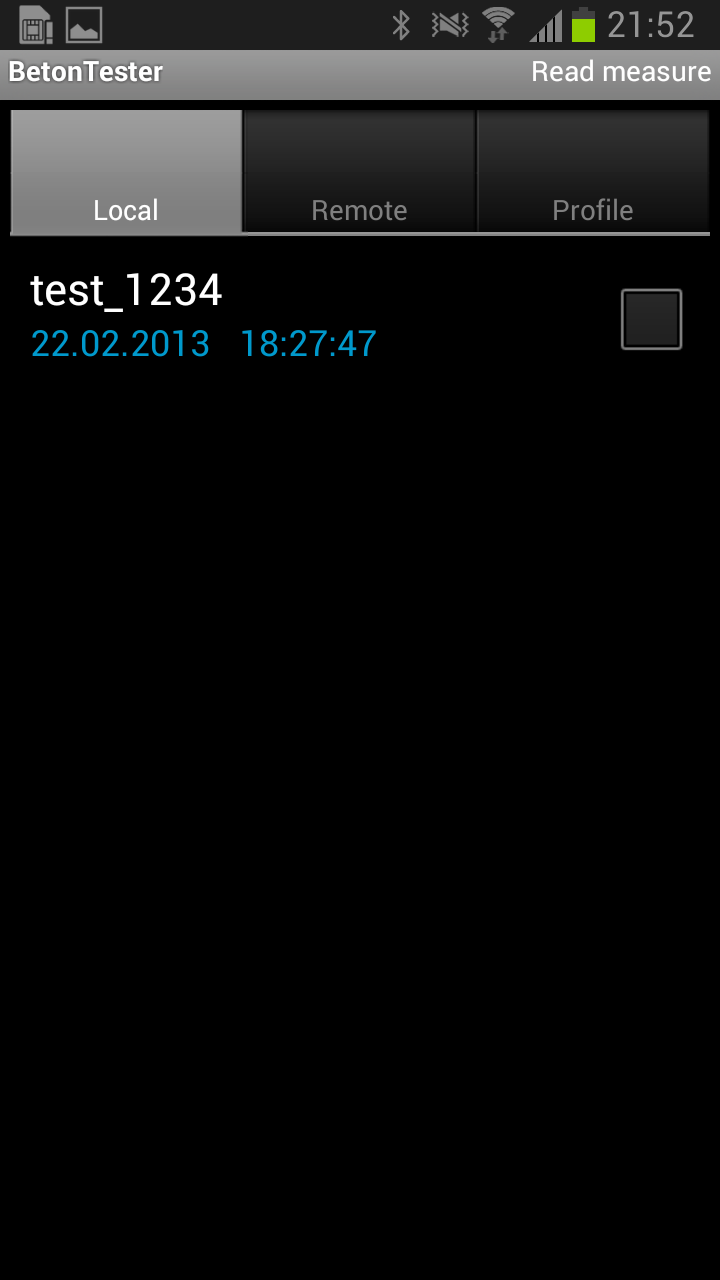
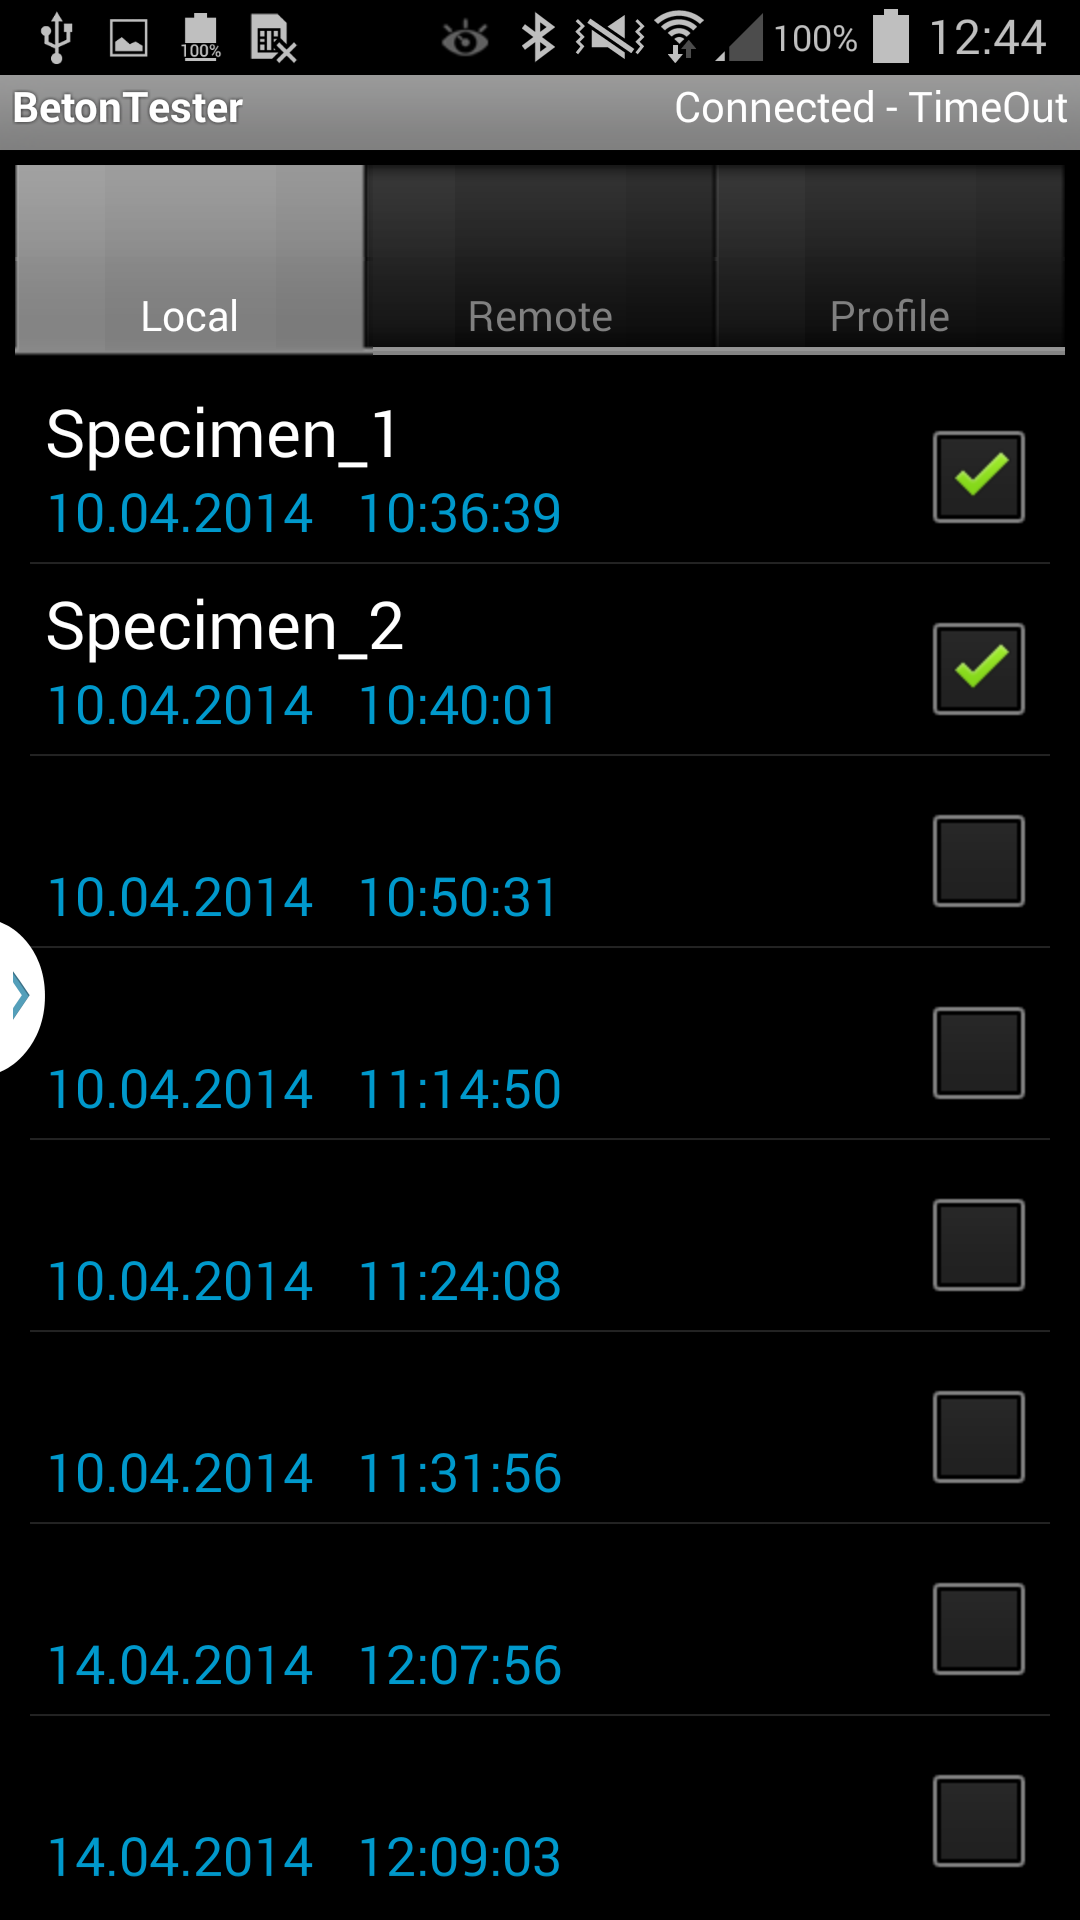
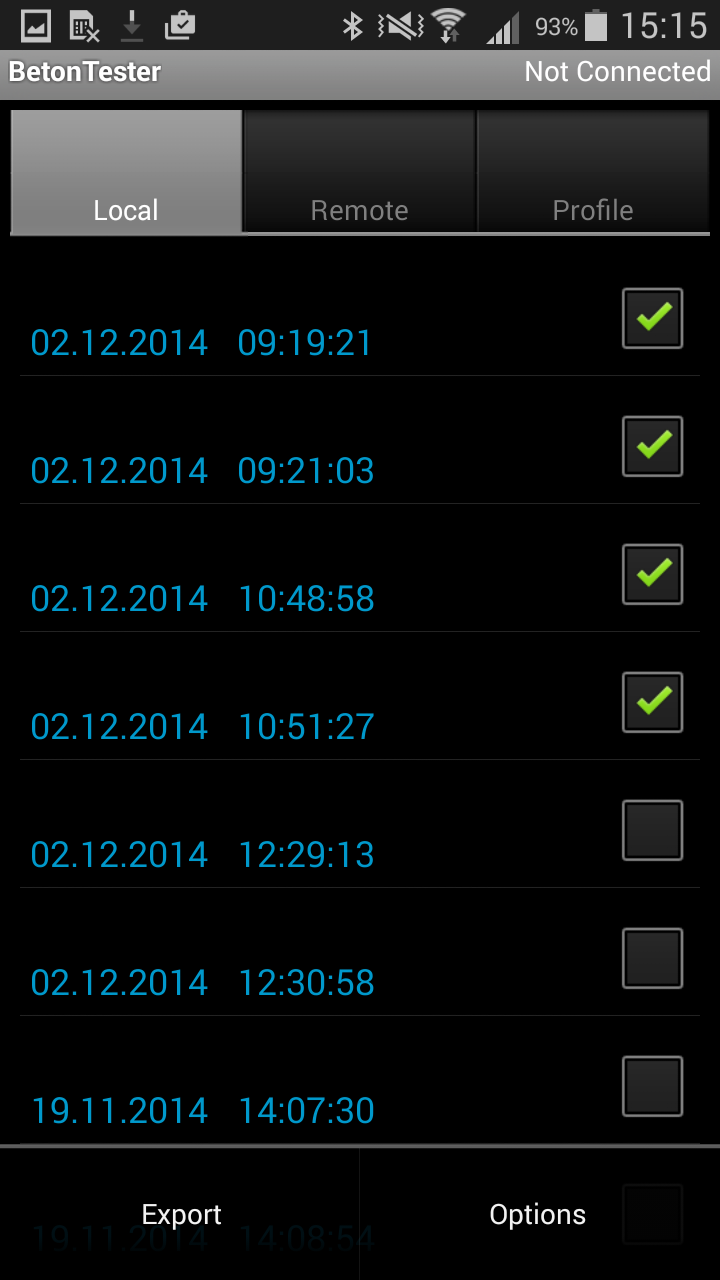
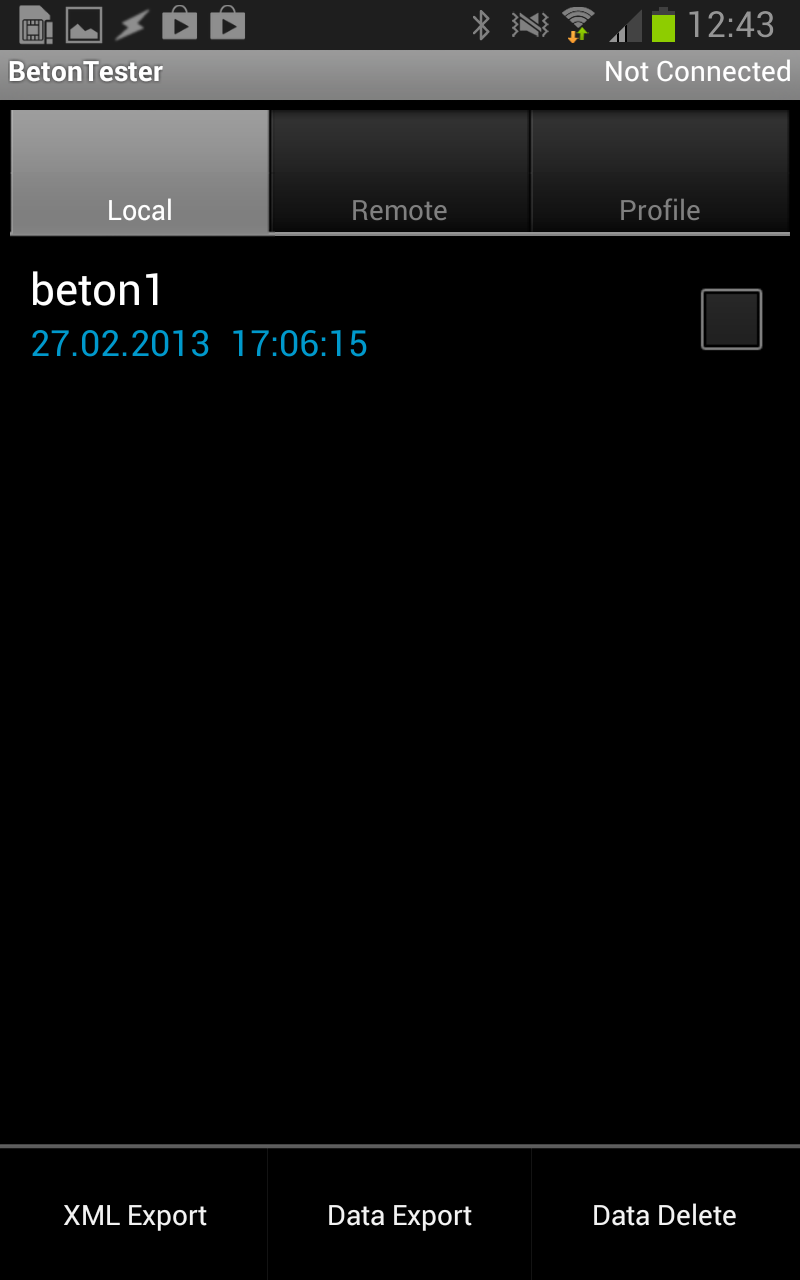
Chose the LOCAL tab on the smart phone. All data sets stored at the smartphone so far, will be shown:
If you start a new series of measurements, it is the best to delete all prevouis measured data from the smart phone (assuming the are already transfered into a PC). See chapter 5.2 Deleting data sets from the smart phone.
Up to 37 measurements can be stored at the eBT-2. These are non-volatile saved with date and time. Afterwards the data can be wireless transfered to the smartphone. To do so, switch on the smartphone and the eBT-2 with the red ON/OFF switch.
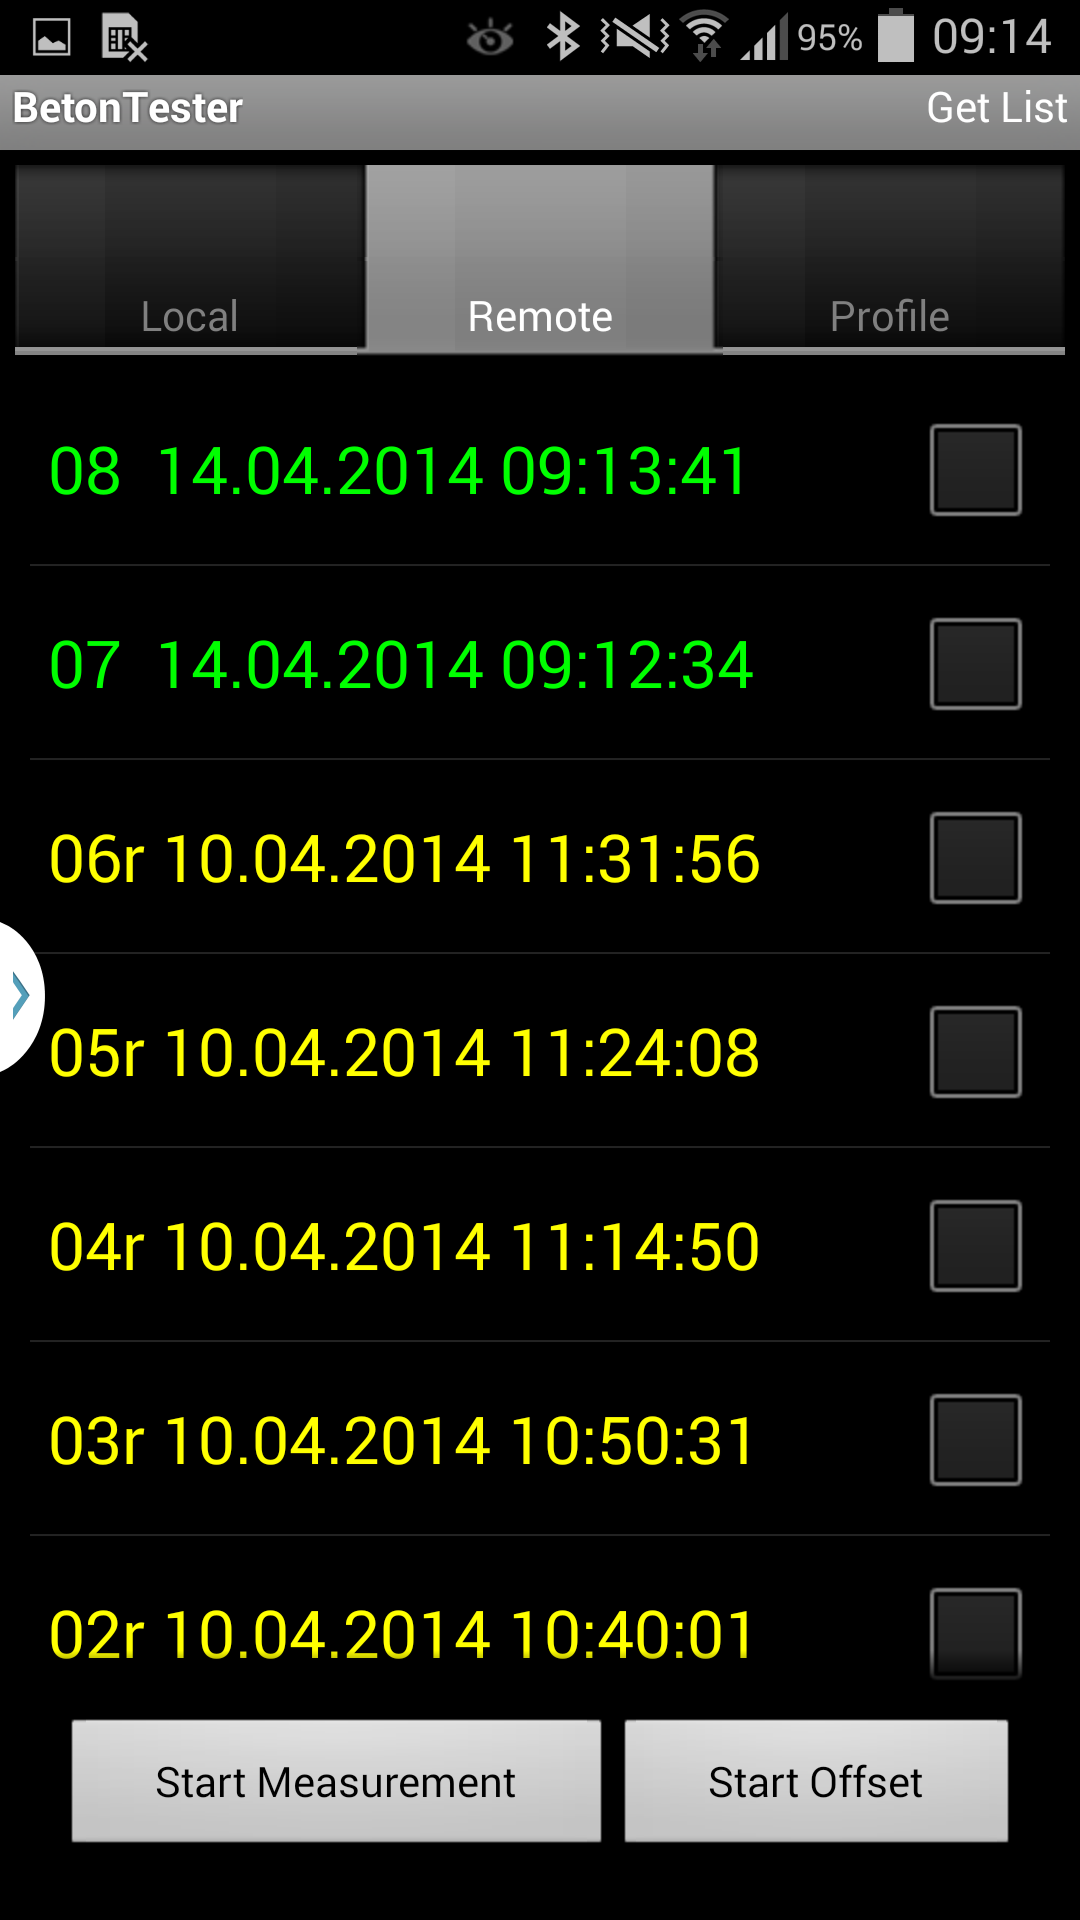
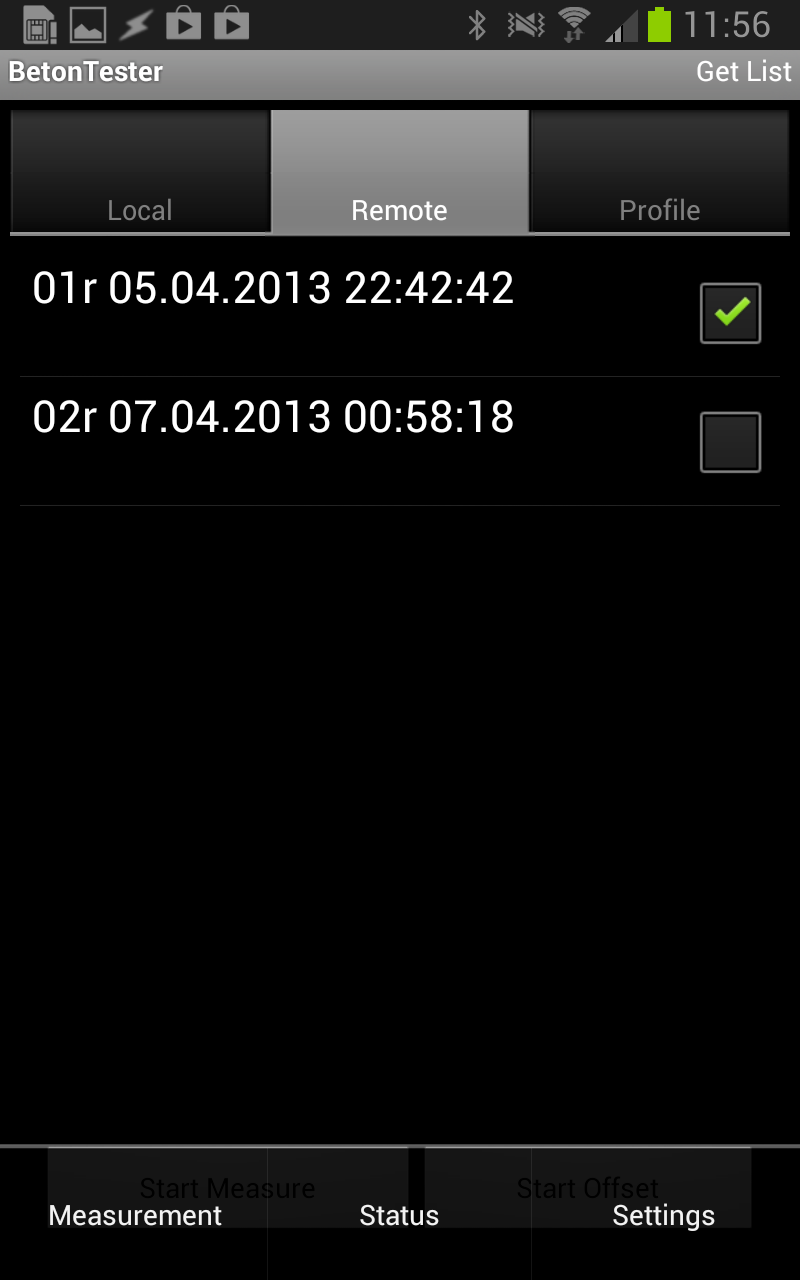
Chose the tab REMOTE. The smart phone shows all data sets currently stored in the eBT-2 device. Already transfered data sets appear in yellow. Measured data, not transfered, appear in green.
| Start the measurement | Start the measurement | Start the measurement | |
 |
 |
 |
 |
|
These are identification parameter
(head data of a measurement) like consecutive number, date and
time, which are assigned to each data set automatically by the
eBT-2 device. Data sets in yellow are already transfered to the
smart phone, data sets in green are not transfered and only stored
on the eBT-2.
|
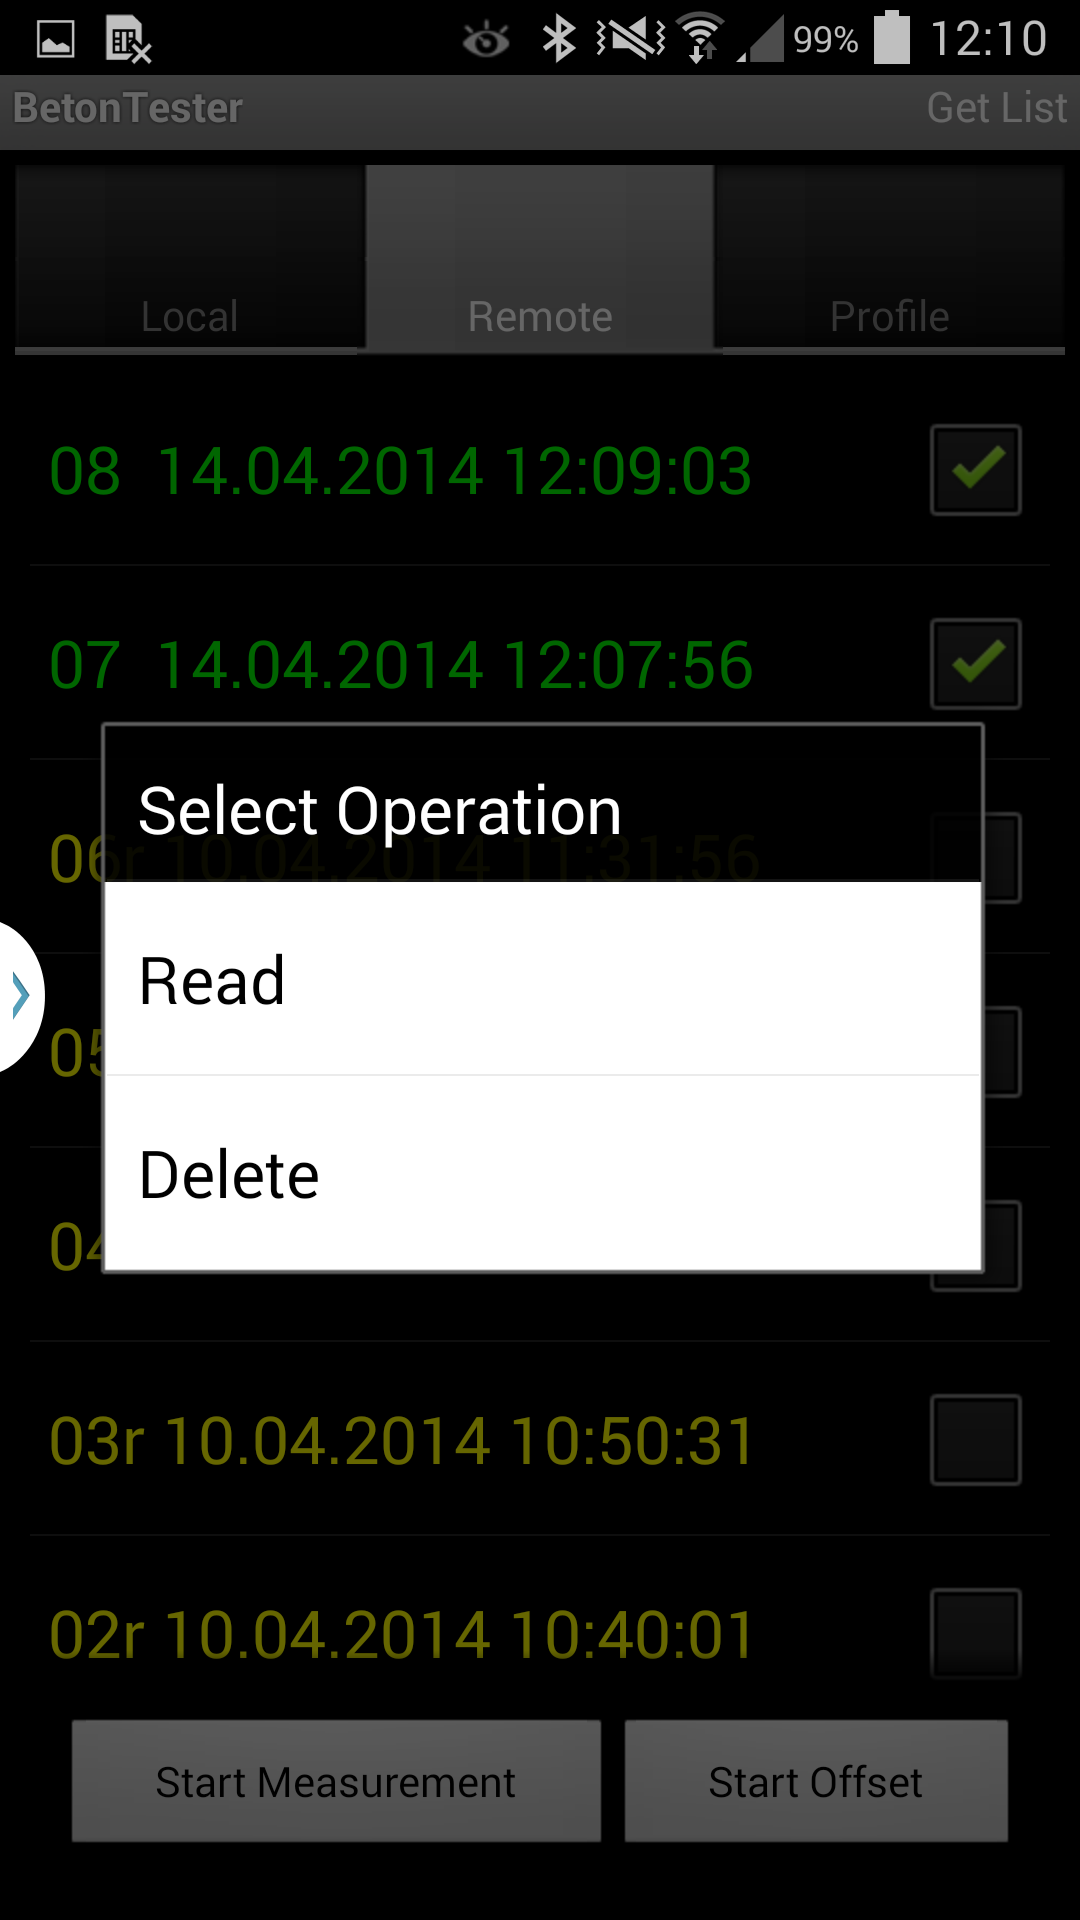
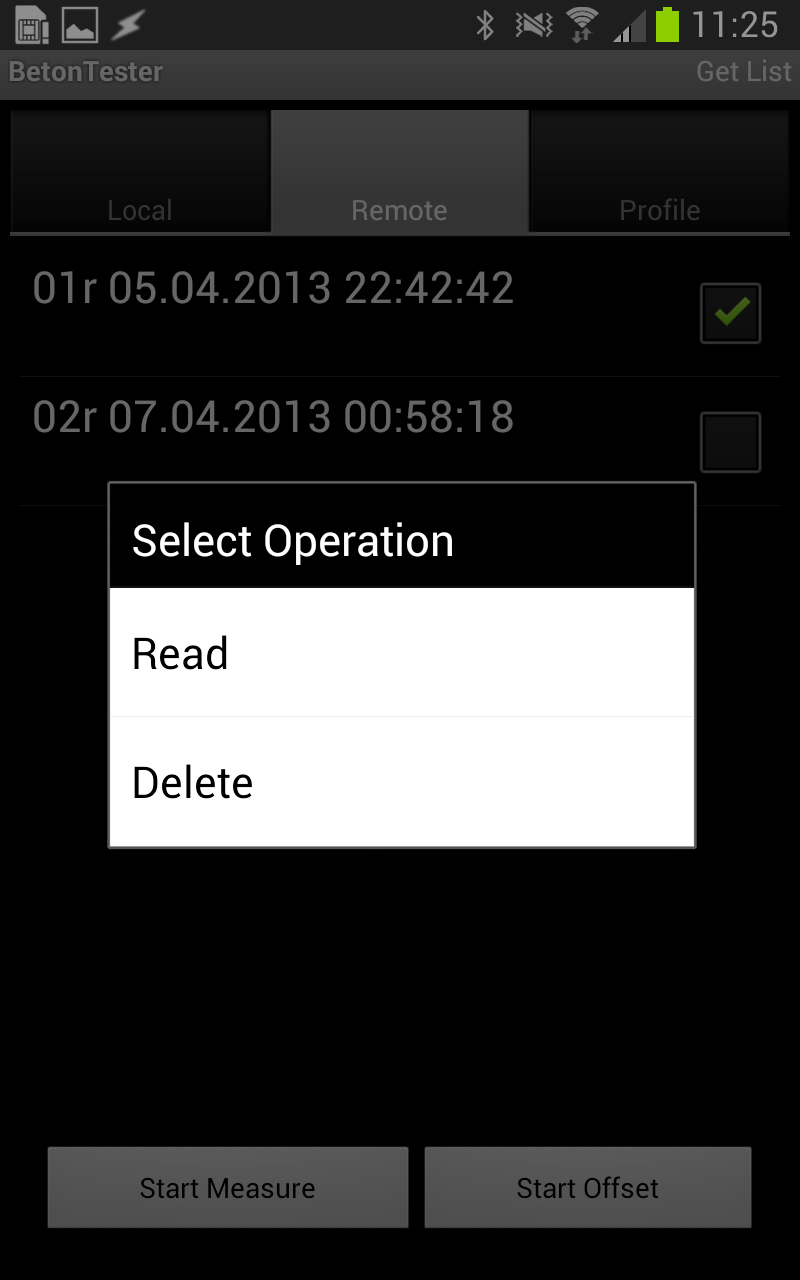
Select the data sets to be transfered
by ticking the checkbox, tap on the selected items and hold until
the Window "Select Operation" opens.
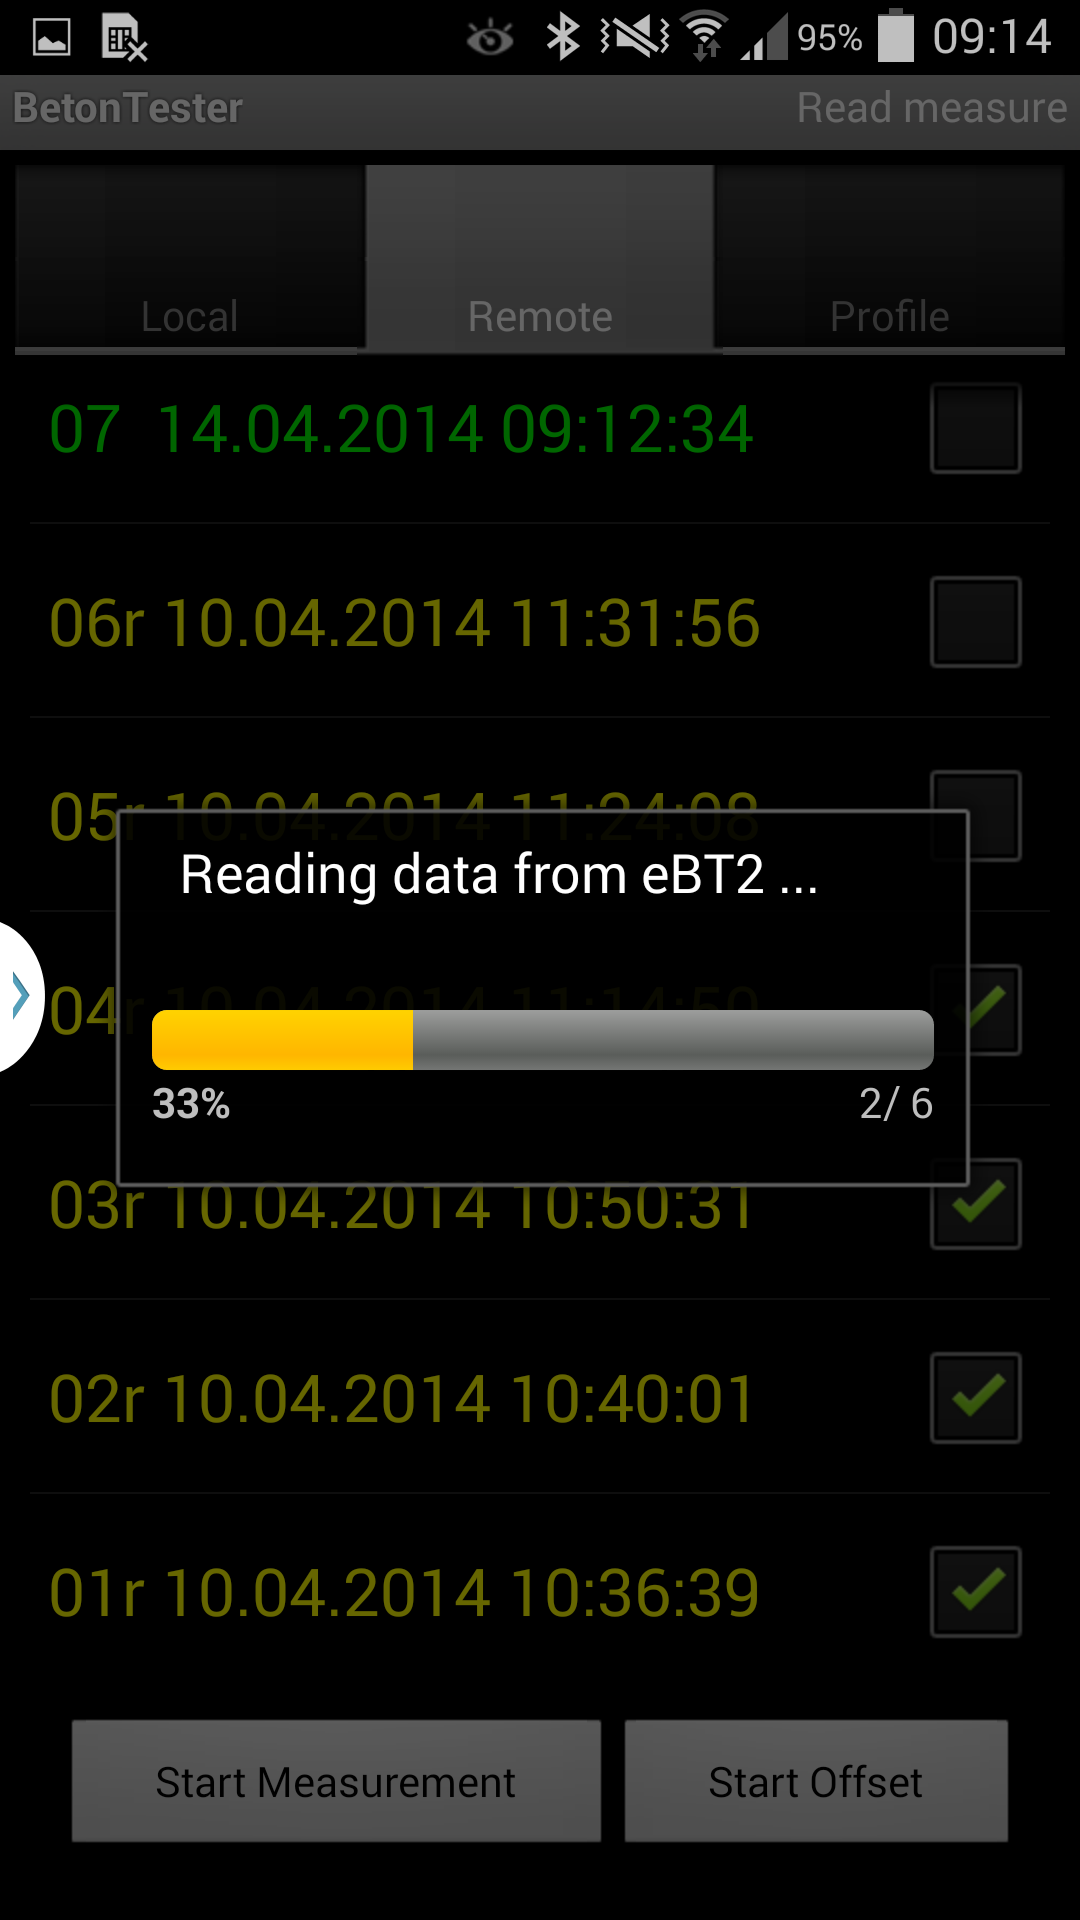
Tap "Read" to transfer selected data
sets.
|
Progress bar shows the status of the transmission. When a data set is transfered it changes from green to yellow. | Chose tab LOCAL to see transfered items |
![]()
Or you can read all measurements at once, in the REMOTE tab tap to Menu button (left corner)
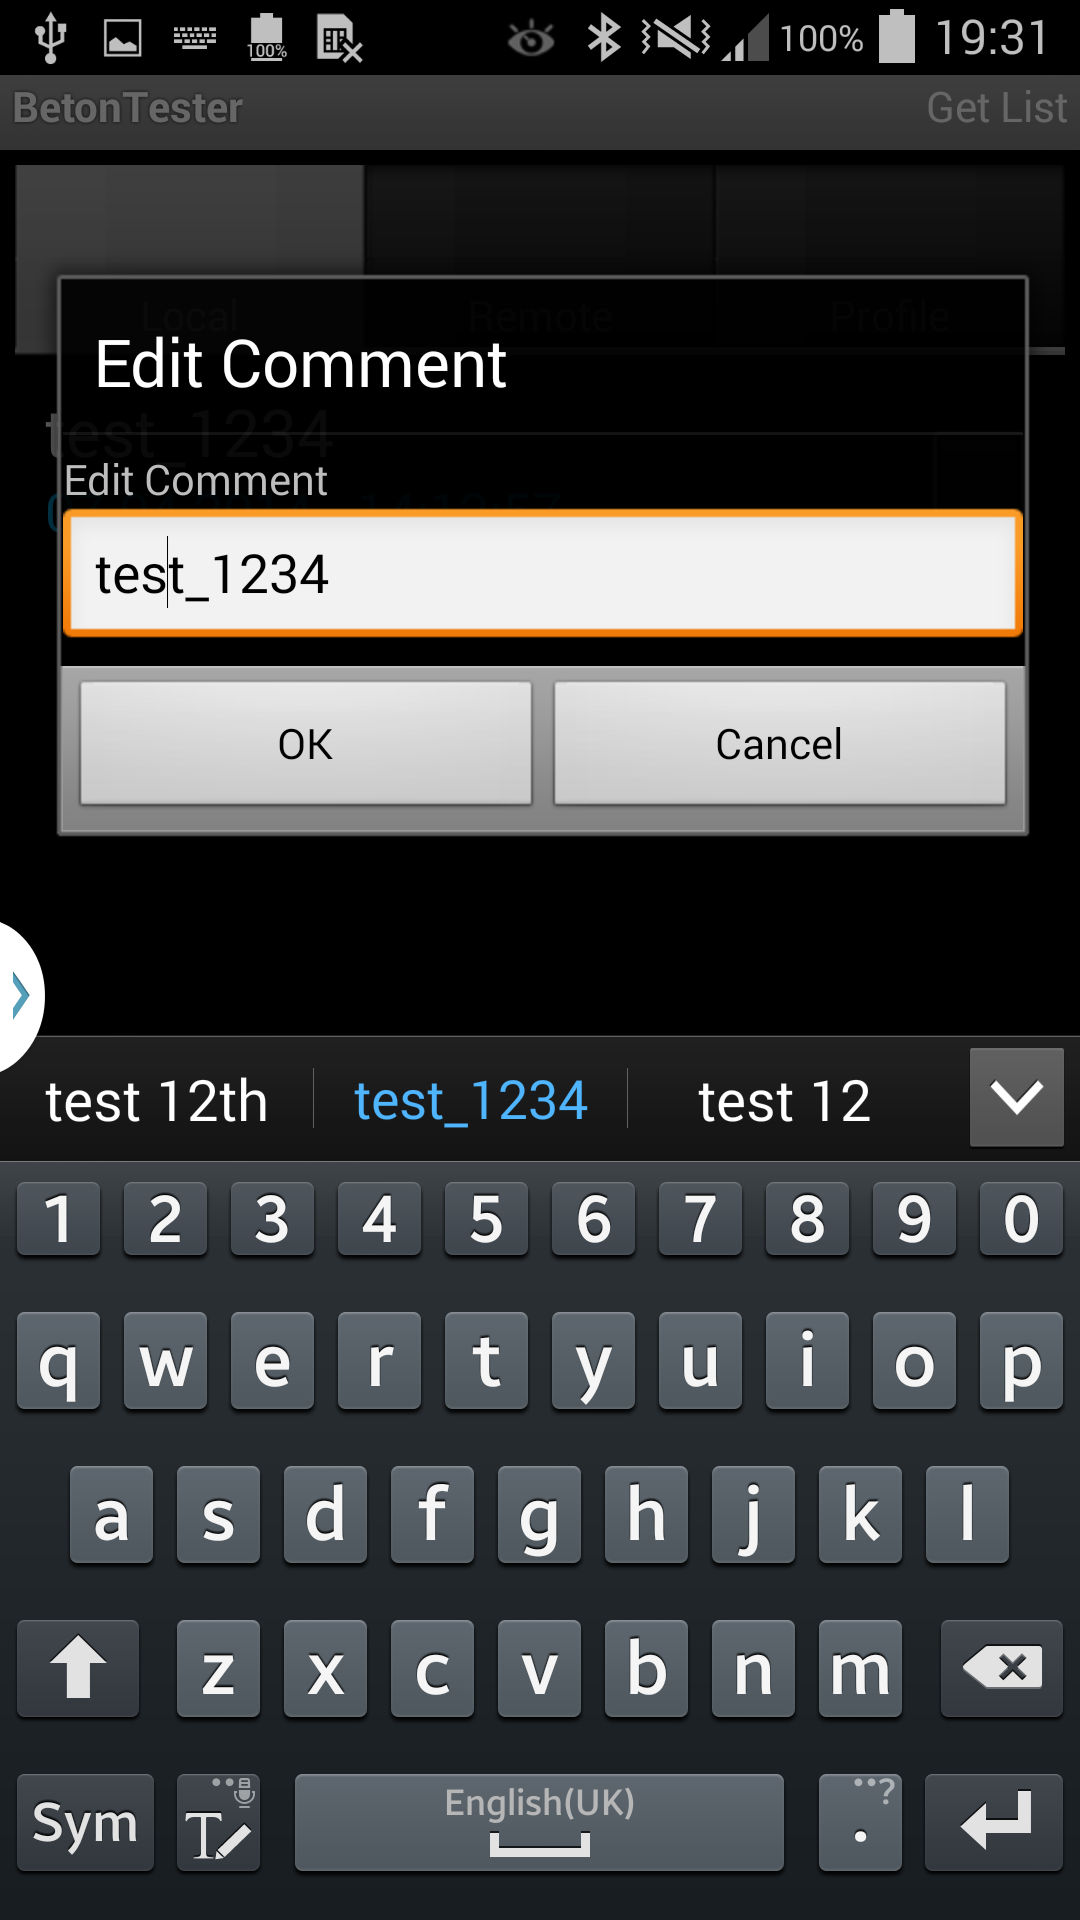
After the transmission switch to the LOCAL tab. Now you can assign a name or a description to each data set ("Edit Comment").
| Select the data set | Name for the data set | Overview | ||
 |
 |
 |
||
|
Tap and hold on the selected item.
A menu window is opening,
chose "Edit Comment"
|
Enter
the comment (name of the measurement) |
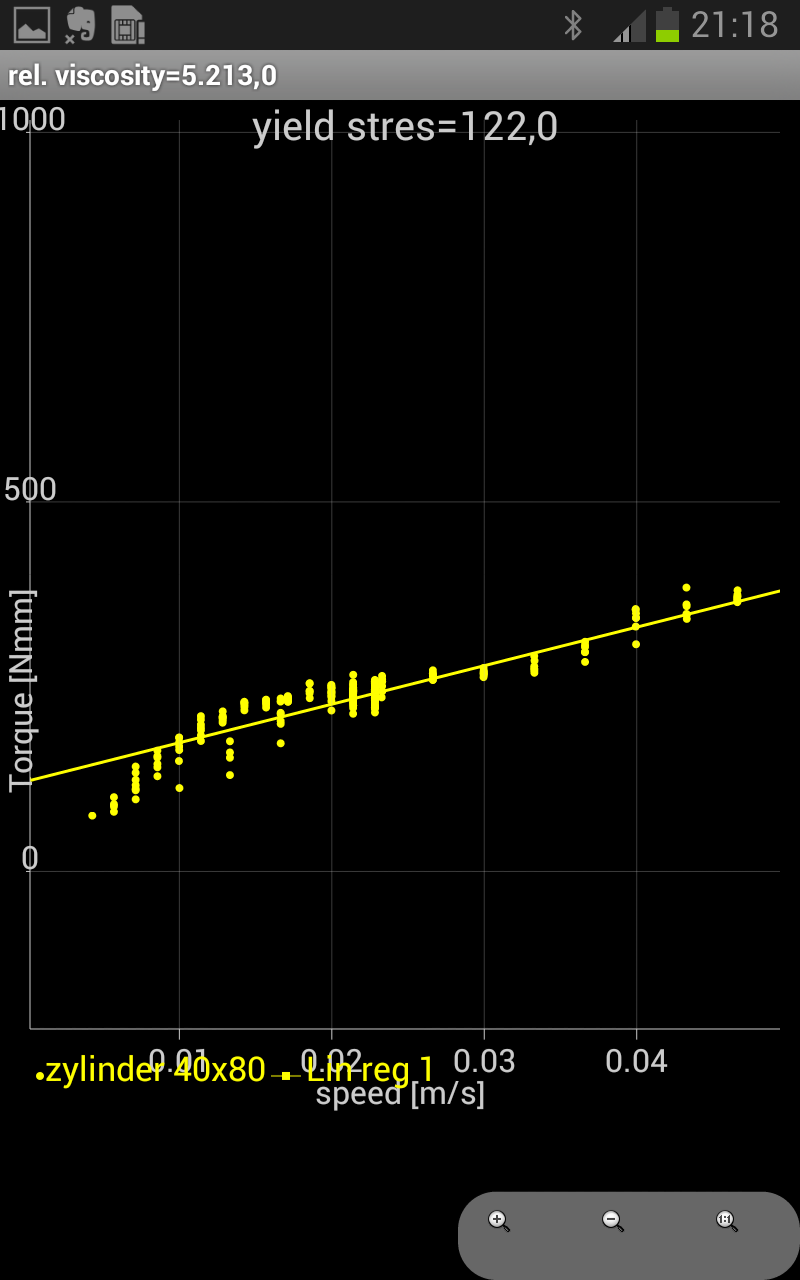
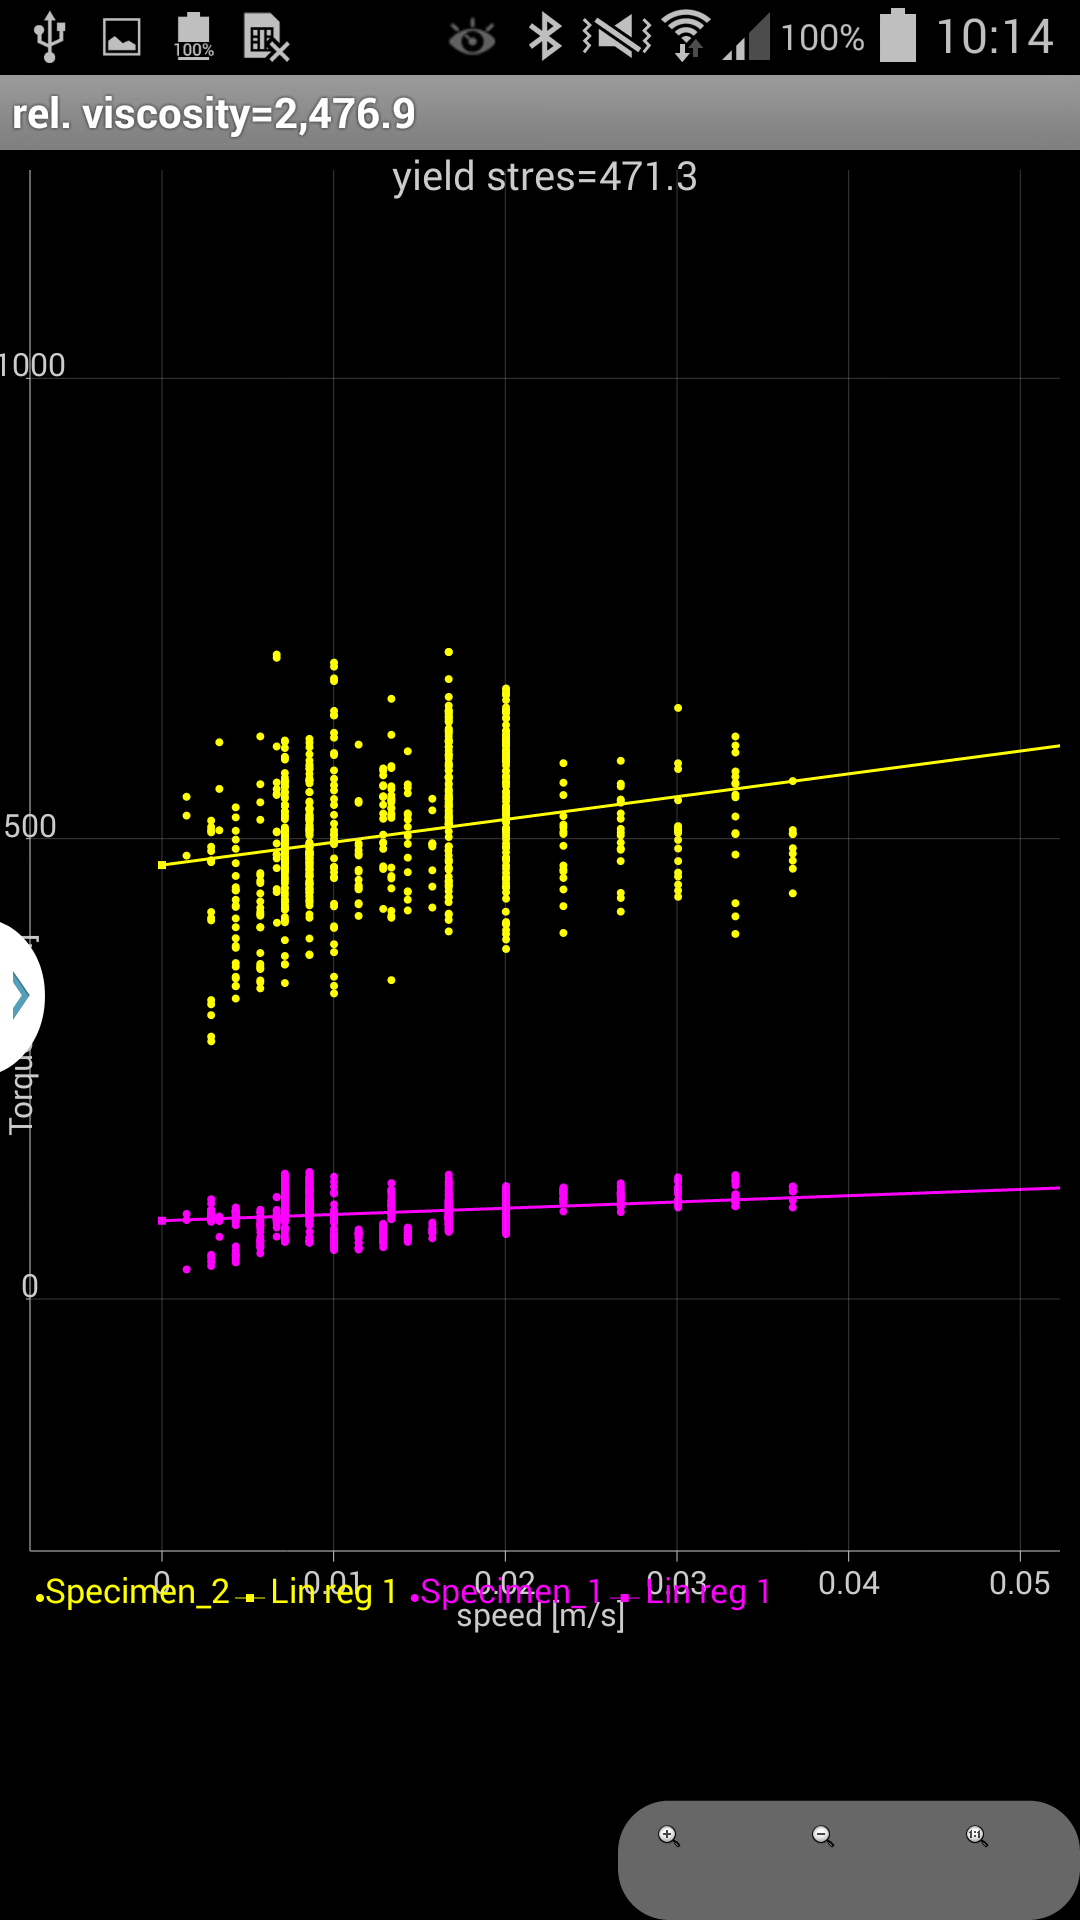
The smartphone calculates and shows in graphical form the flow curve with relative viscosity, better viscosity parameter (= the gradient of the straight line), and the relative yeald value, better yield value parameter (= axis segment of the straight line).
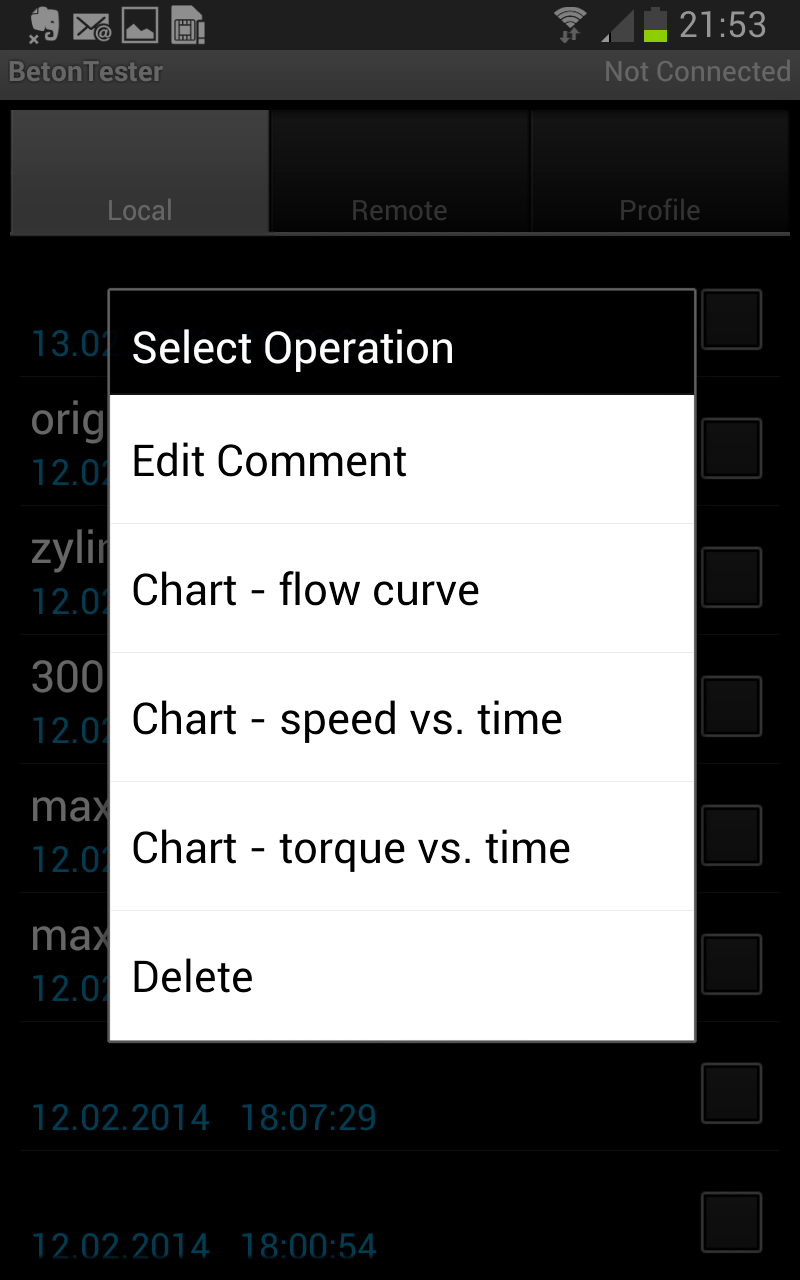
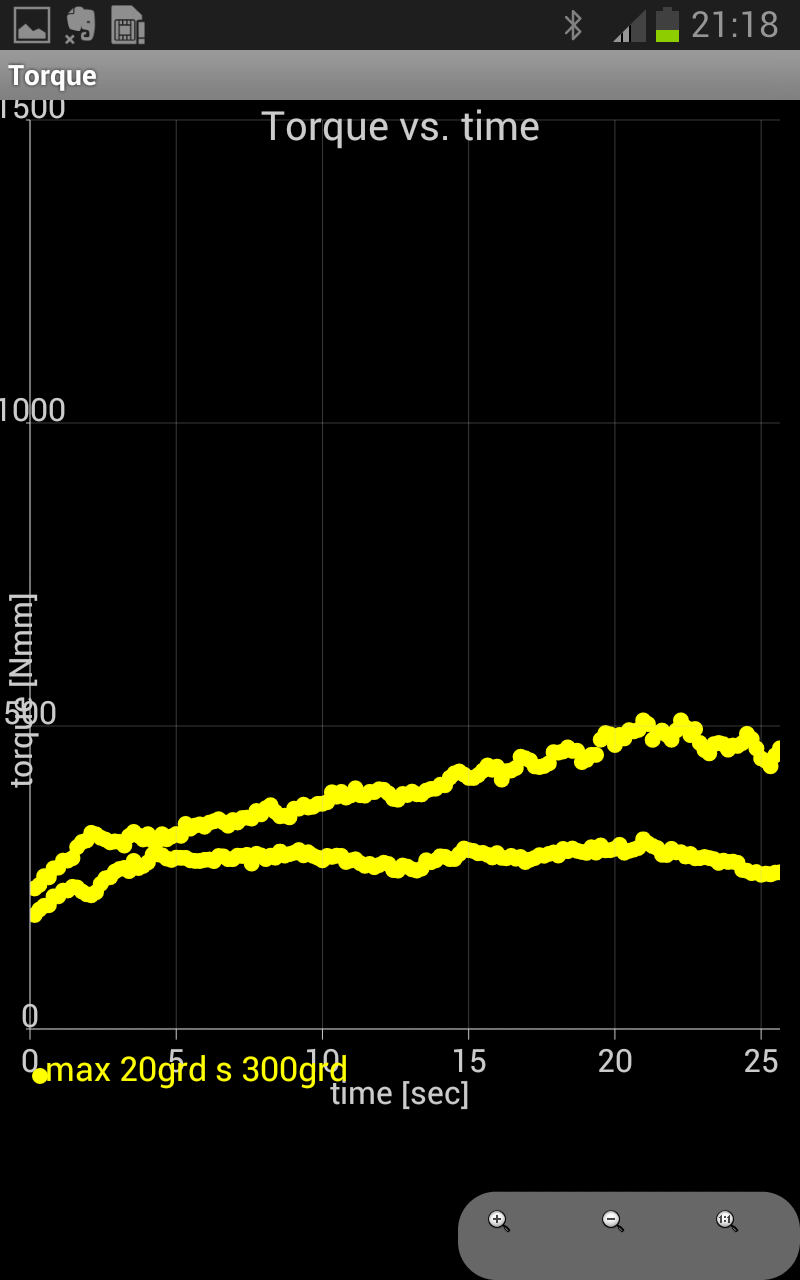
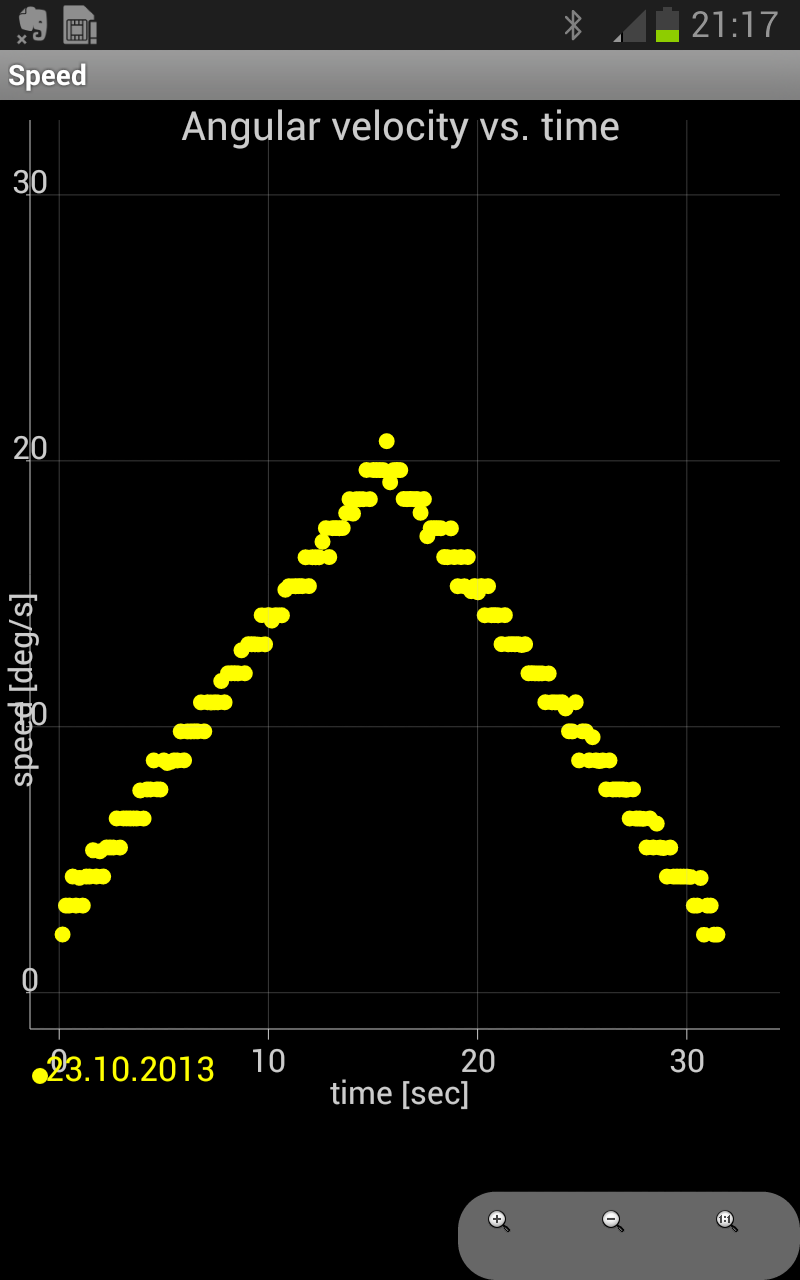
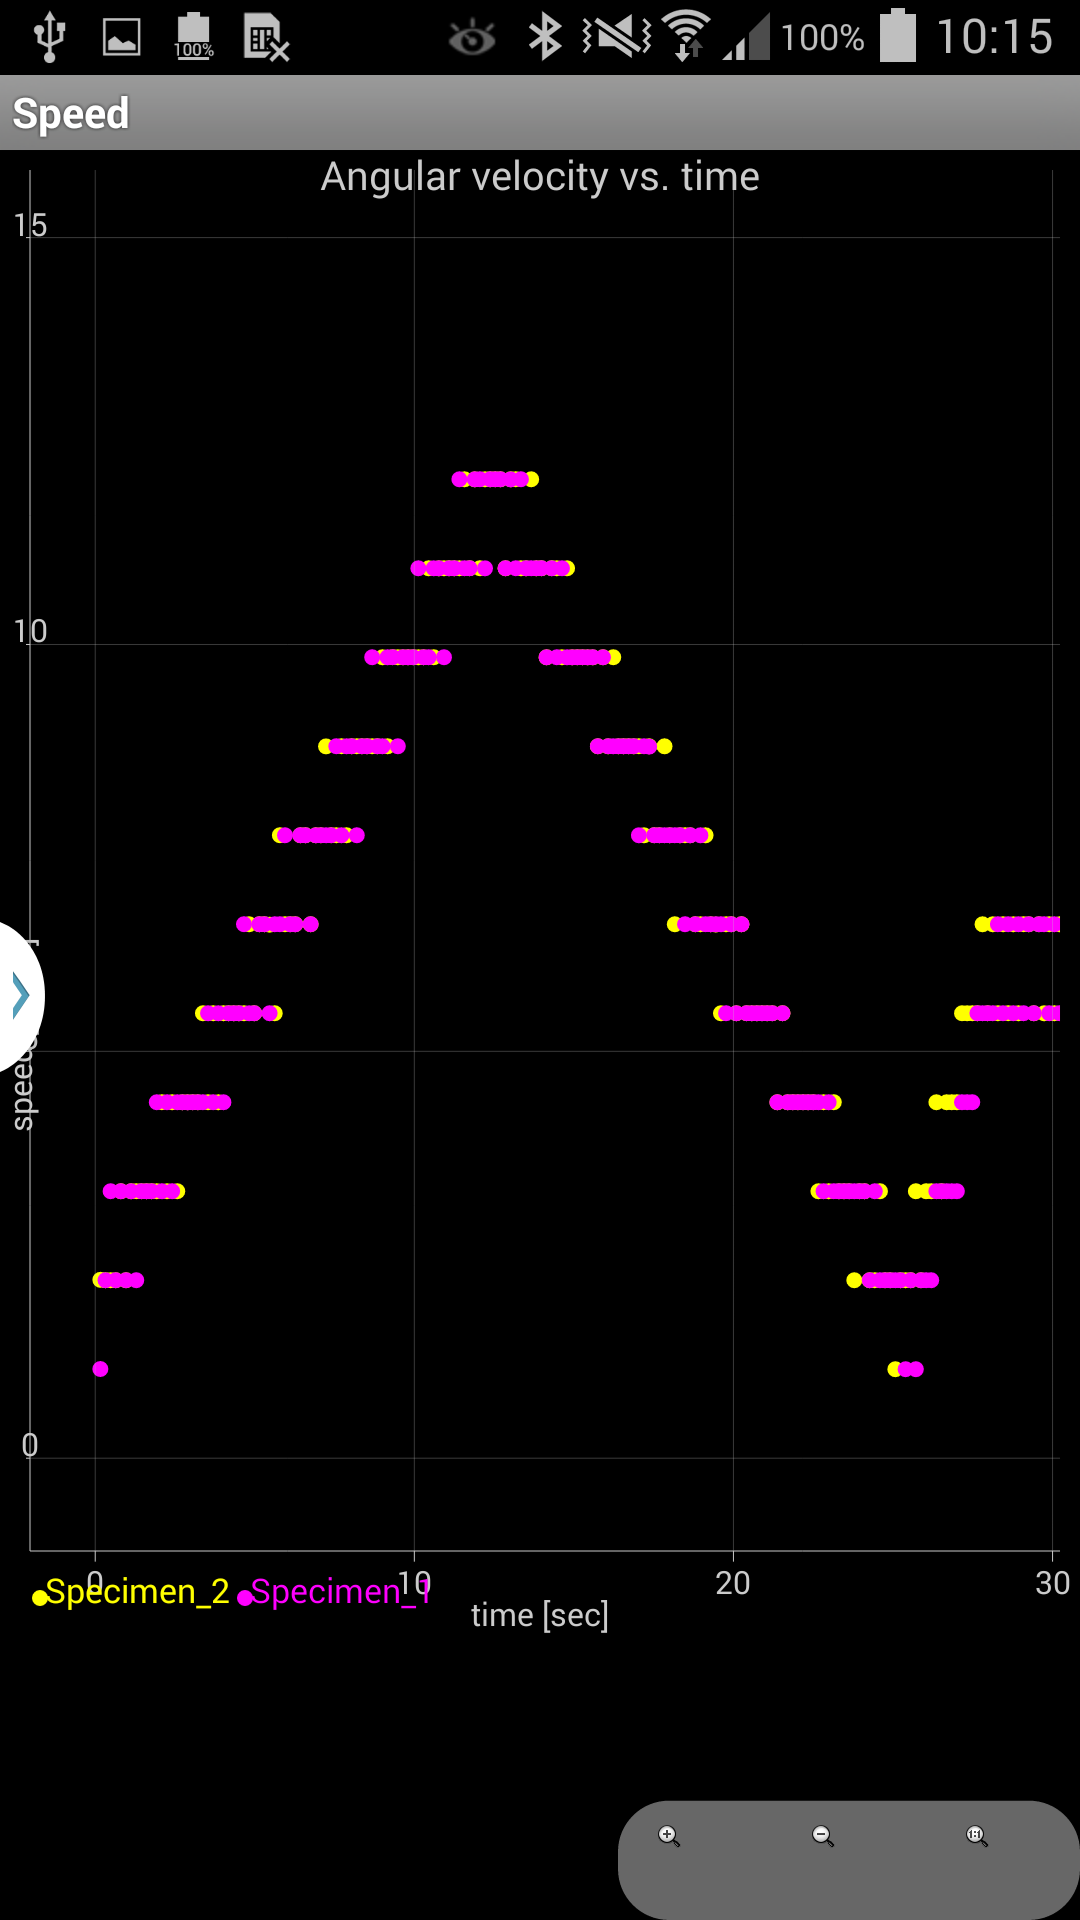
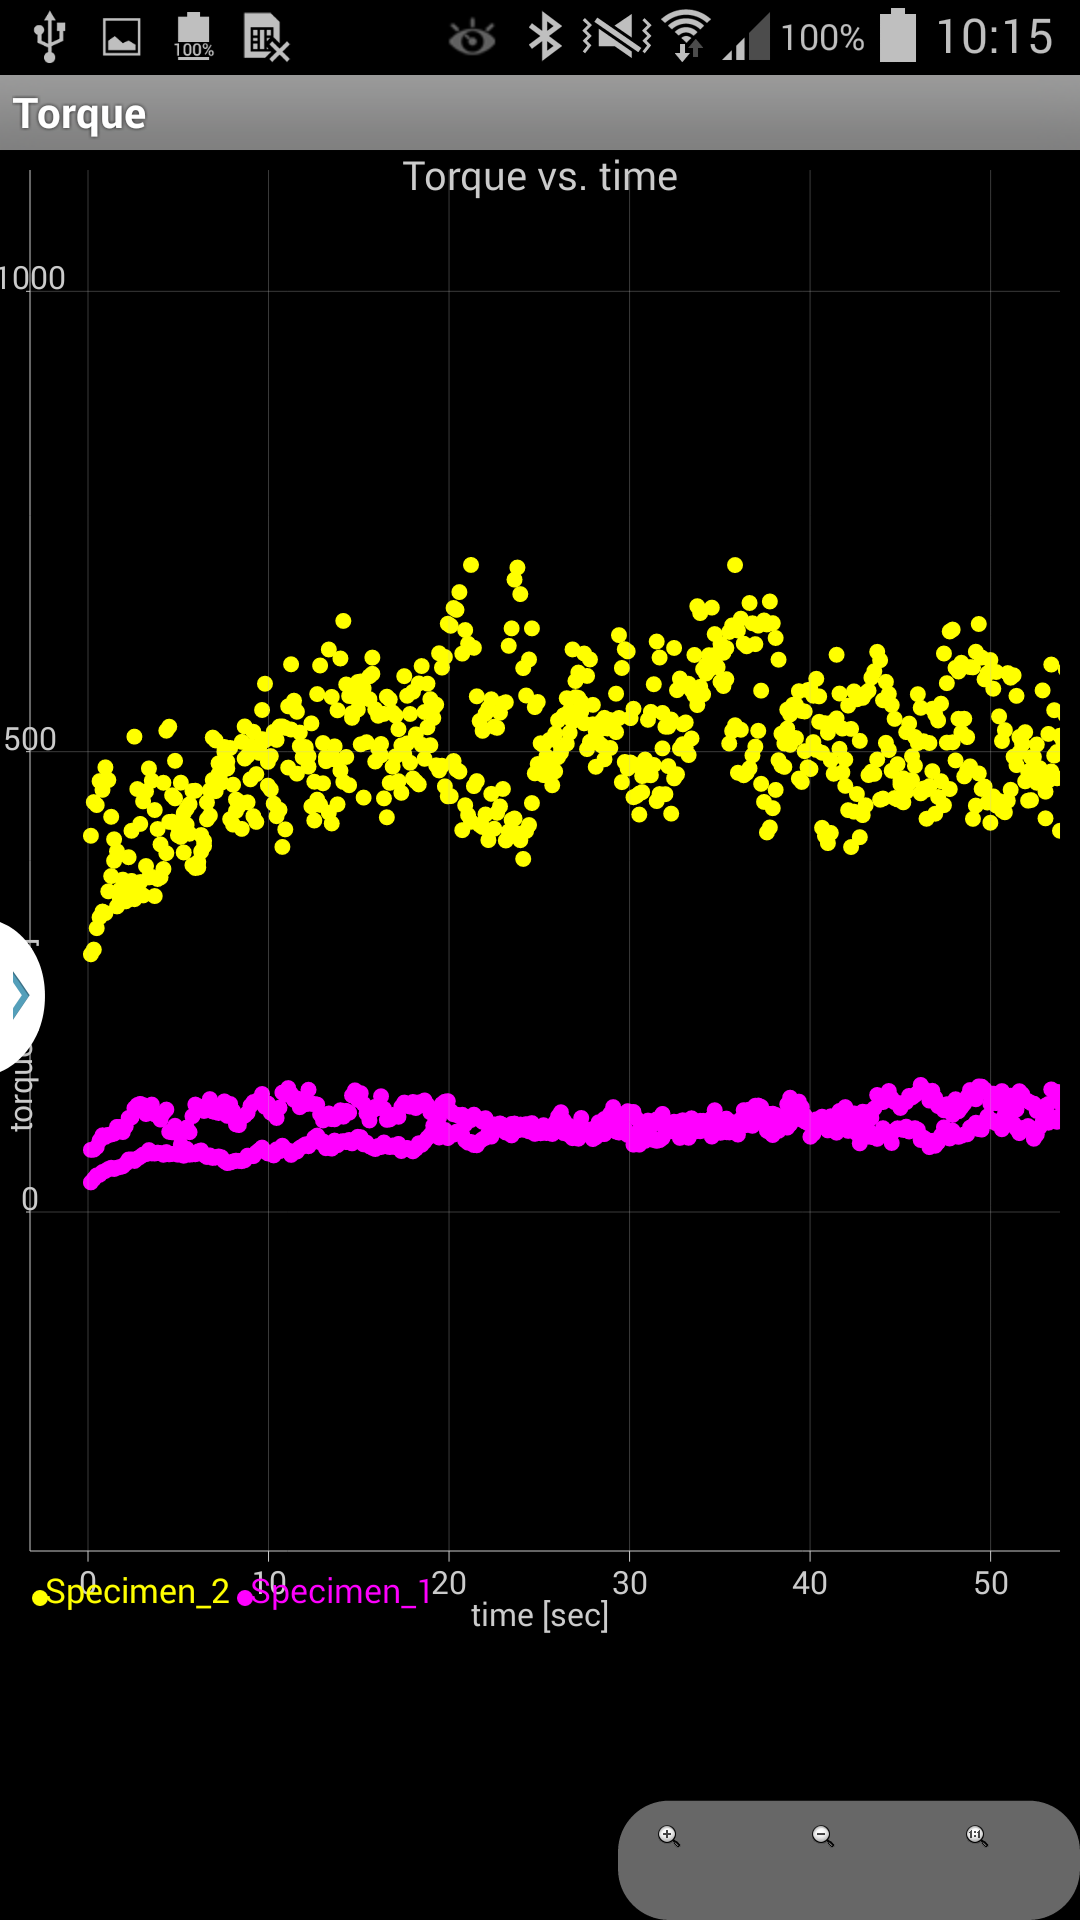
In the LOCAL tab chose one data set. Open the menu by tapping and holding the dataset item. The function Chart calculates the data set and the flow curve, torque vs. time and angular velocity vs. time will be shown graphically.
| Chose the chart type | Flow curve | Torque vs. time | Angular velocity vs. time |
|
 |
 |
 |
|
In the status bar you see the
numerical values
of the two parameters rel. viscosity and rel. yield value. |
Or you can compare two or more measurements
| Compare two
measurements |
Compare two measurements | Compare two measurements | Compare two measurements |
 |
 |
 |
 |
| In the LOCAL tab select the measurements you wish to compare | Compare two flow curves |
Compare two velocity curves | Compare two torque curves |
Back to the office you can transfer the measurement data to a common PC under Windows, MacOS or Linux. To the measuremnts export, the XML-File format is specified. How to create a XML-File of the dataset transmitted from the eBT-2 and internal stored on the smartphone see next chapter 4.9 Export data into Microsoft Excel.
There are several ways to transfer data to the PC
In the LOCAL tab select the measurements you wish to export, tap to the MENU Button (left corner on the bottom of the smartphone) and select "Export"
| Export the
measurements |
Export the measurements | Export the measurements | Export the measurements |
 |
 |
 |
 |
| In the LOCAL tab select the measurements you
wish to export Open MENU; tap "Export" |
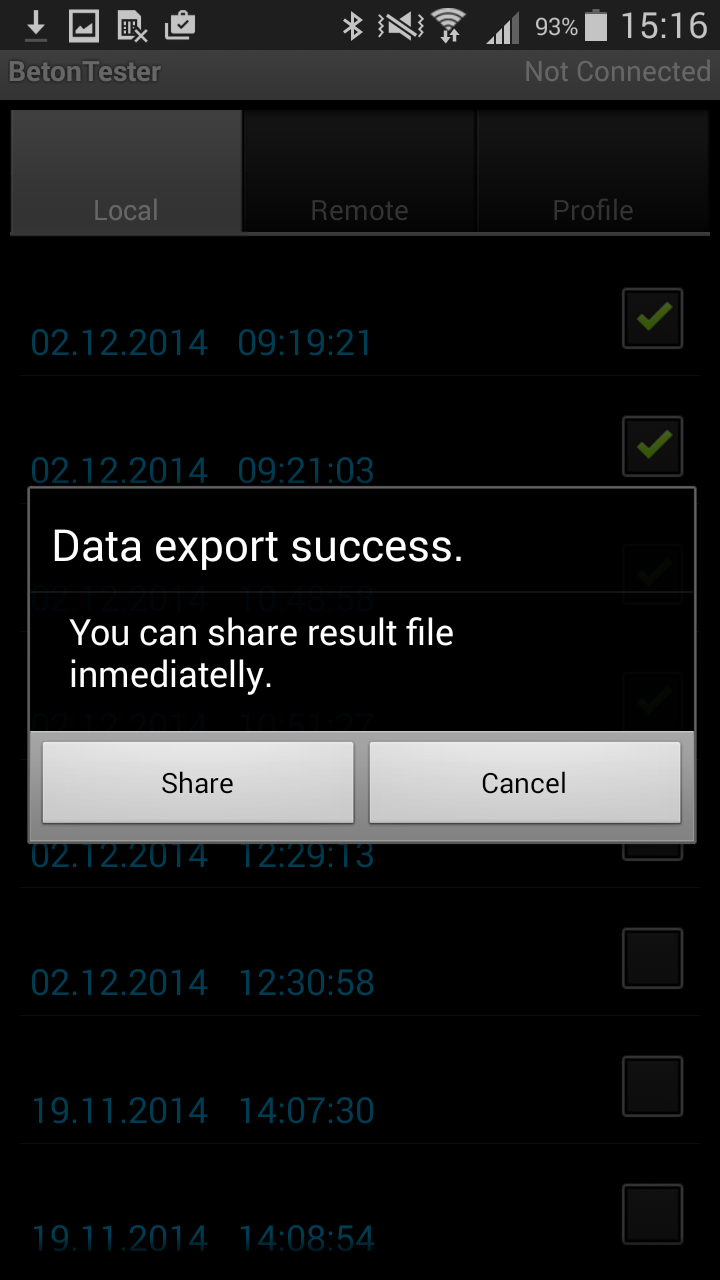
In the internal memory of the smart phone in the folder sdcard0/BetonTesterData a BetonTesterMeasurements.xml file was created. |
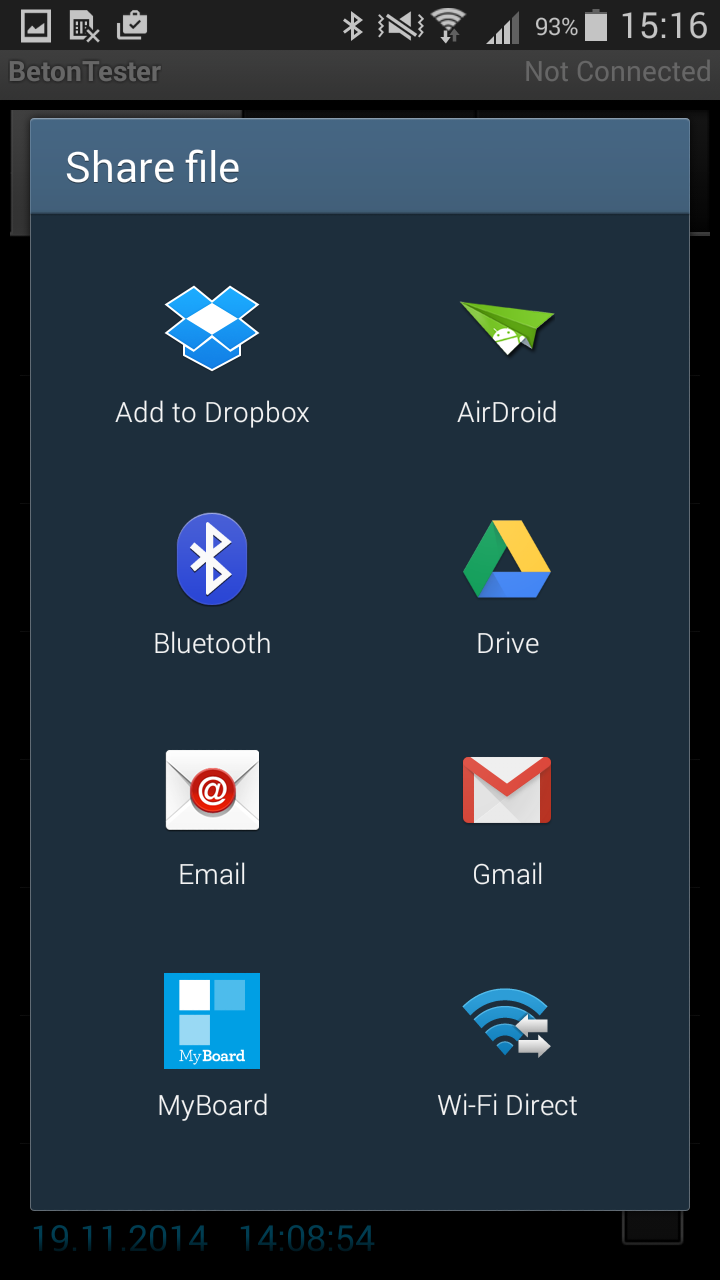
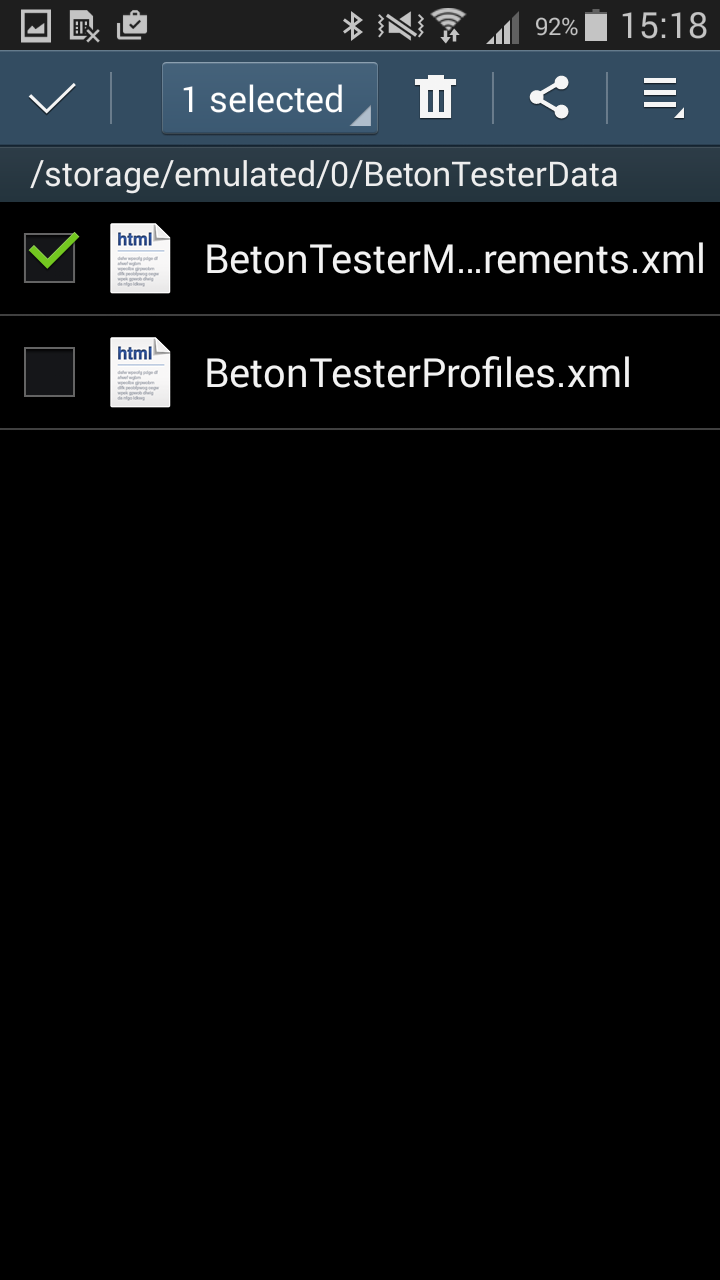
You can share the file by your prefered way right here | or close the Betontester app Open the file manager and go to folder sdcard0/BetonTesterData Select the BetonTesterMeasurements.xml File and tap to the share button. |
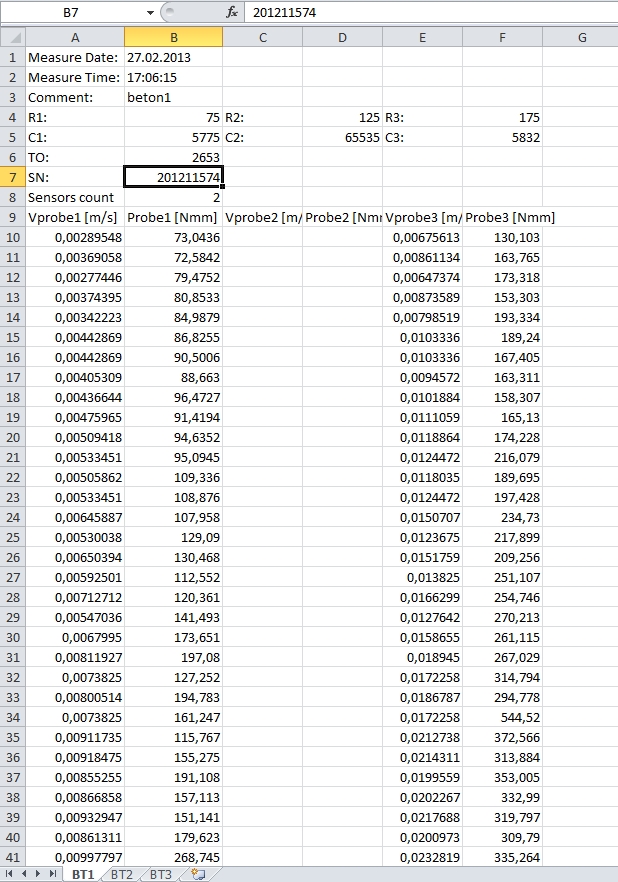
On the PC with installed Microsoft Excel just open the BetonTesterMeasurements.xml file
Each measurement data set is presented as a spreedsheet. The tables and charts can be worked as possible in Excel.
Up to 37 measurements can be locally stored at the eBT-2 device. It is suggested to delete old data sets before starting a new measurement series. Switch to the REMOTE tab
 |
 |
 |
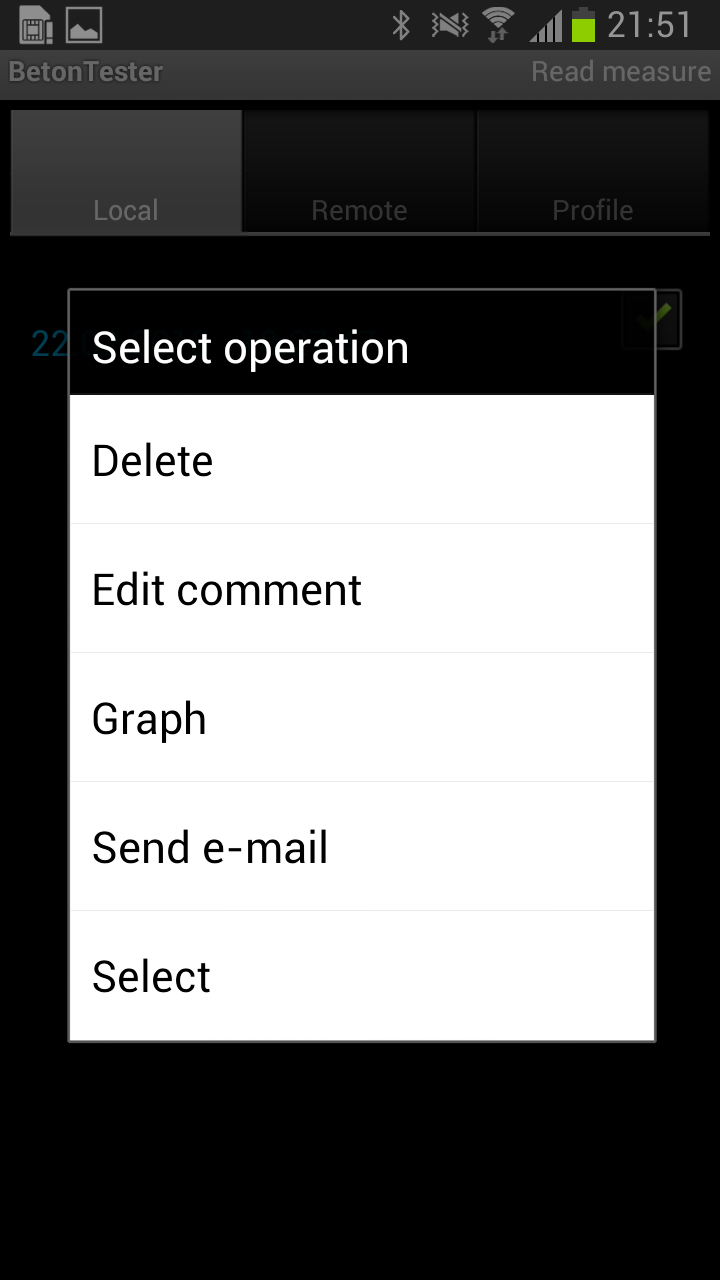
| Select the data set you want delete; tap and hold on the selected item |
Coose "Delete" | Confirm if you realy sure. |
![]()
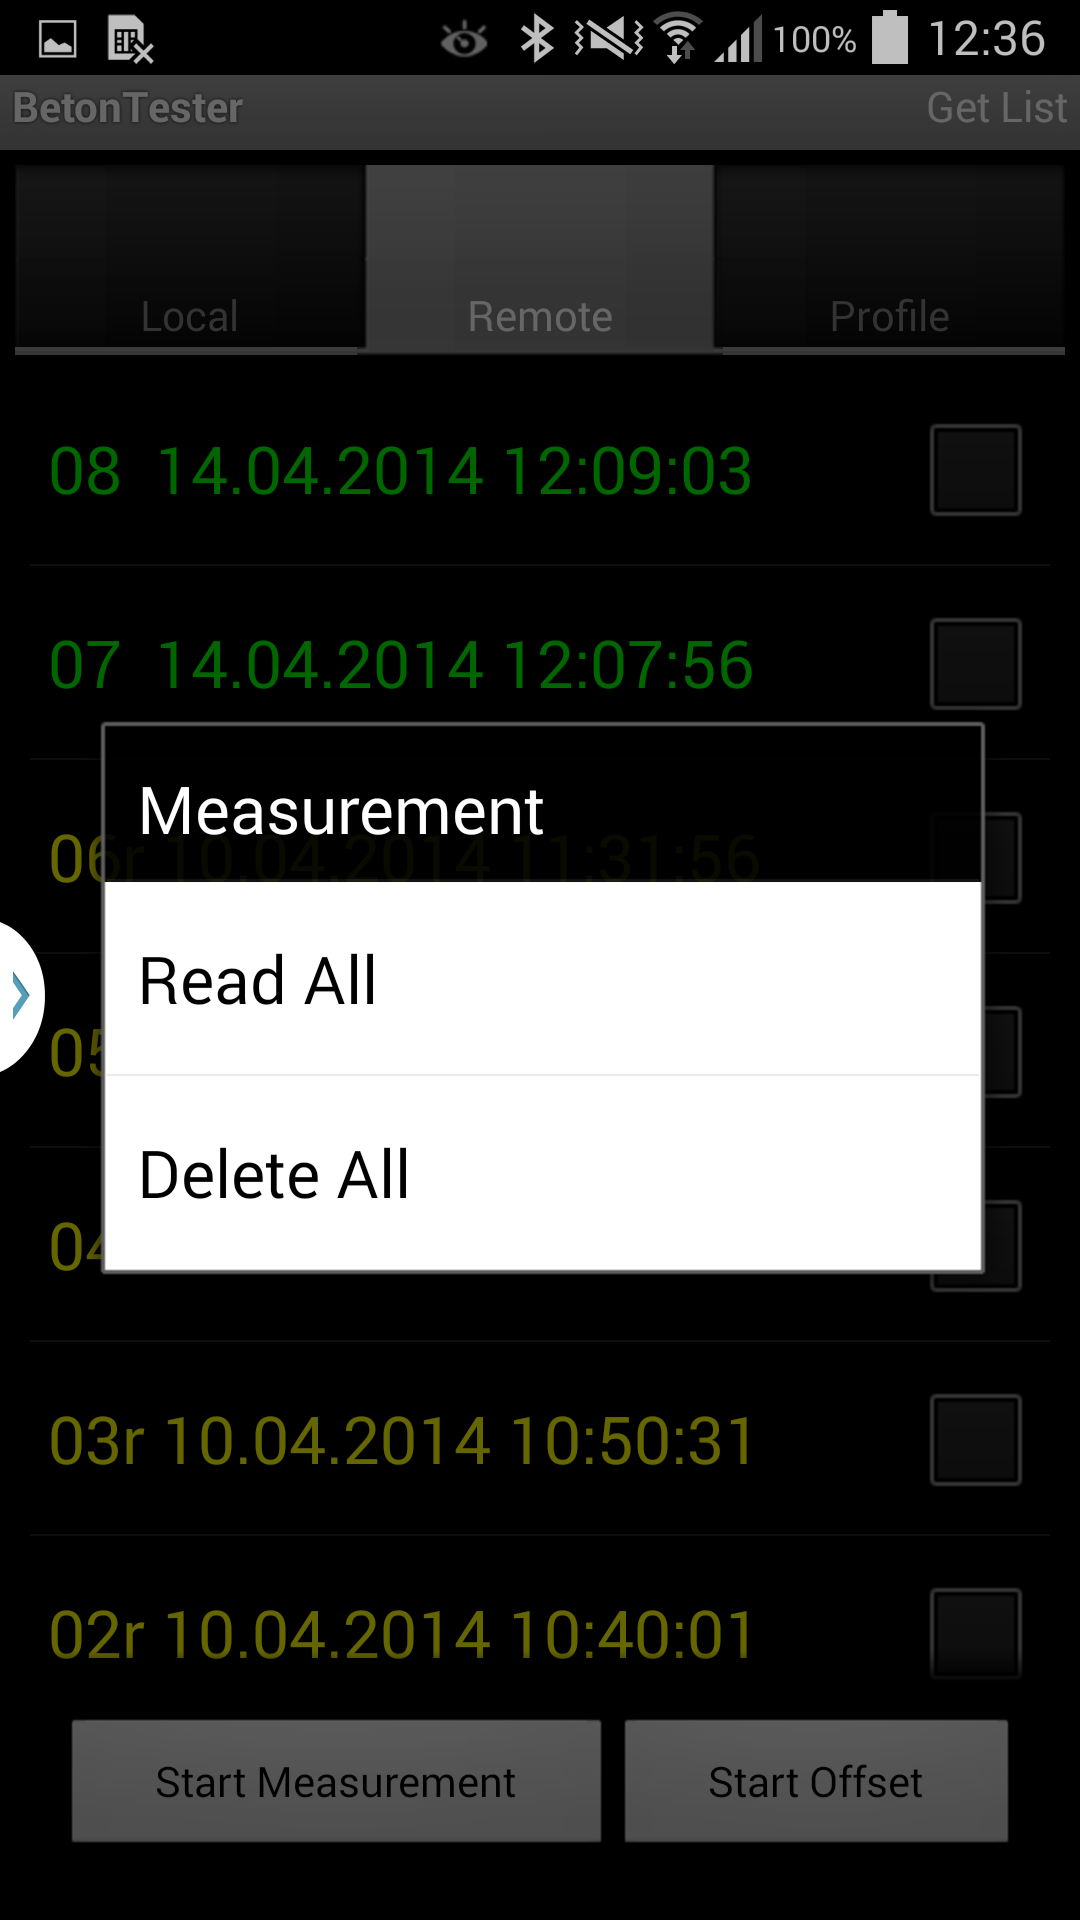
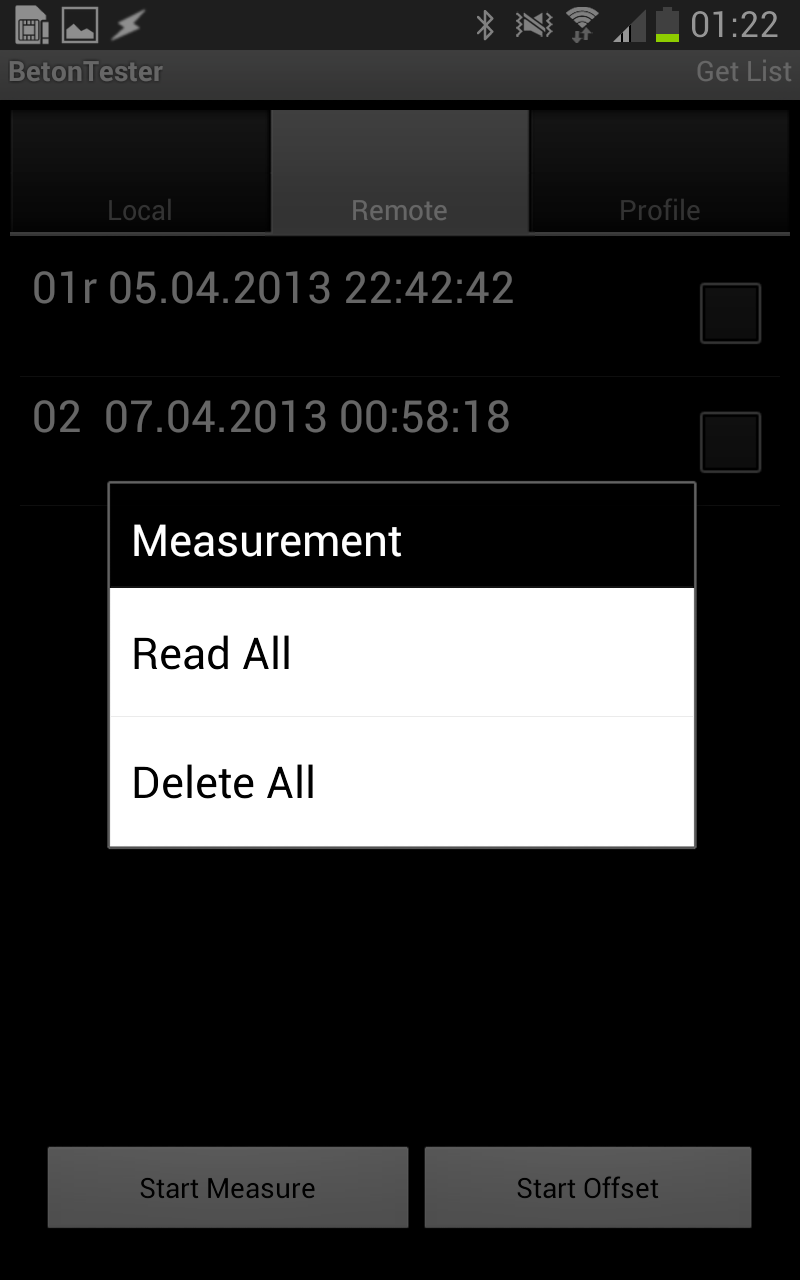
You can also delete all data set on the eBT-2 at once
In the REMOTE tab tap to the MENU button (left corner on the bottom of the smartphone) and select "Measurements"
 |
 |
|
| Open MENU; tap "Measurements" |
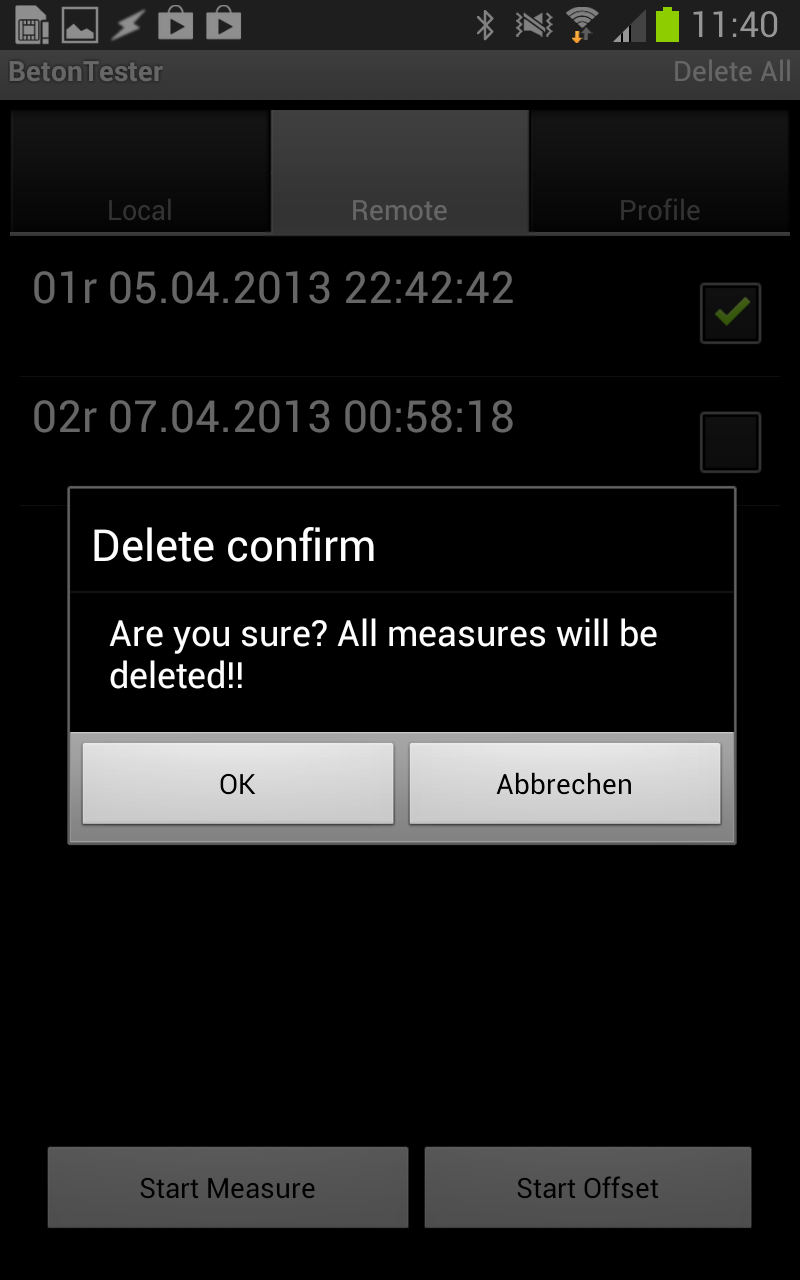
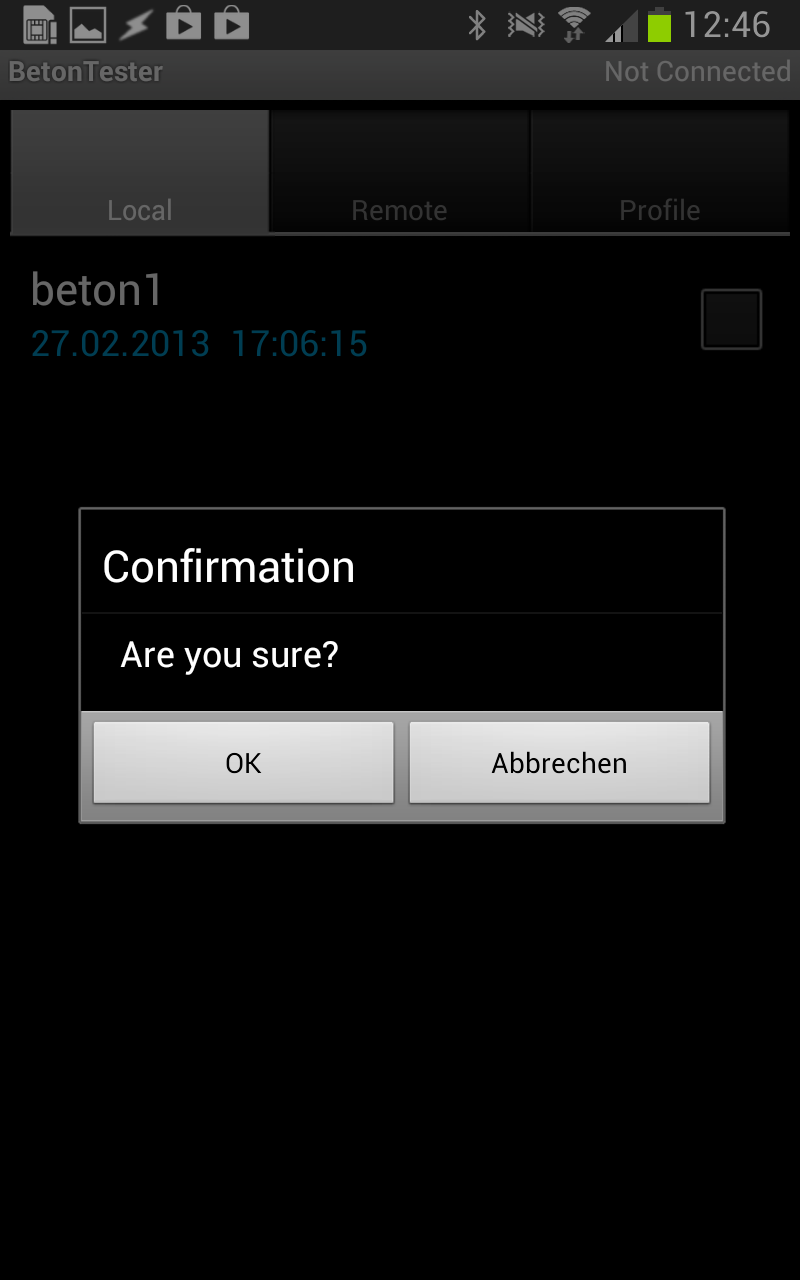
Coose "Delete All" | Confirm if you realy sure. |
In the smartphone all measurements are saved in the internal database of the application program. You can delete selected measurements (multiple choice) or all measurements at once.
|
 |
|
| Select the data set you want delete; tap and hold on the selected item |
Coose "Delete" | Confirm if you realy sure. |
![]()
You can also delete all data sets in the smartphone at once
In the LOCAL tab tap to the MENU Button (left corner on the bottom of the smartphone) and select "Data Delete"
 |
 |
|
| Open MENU; tap "Data Delete" |
Confirm if you are realy sure. |
Here basic settings of the eBT-2 can be changed. All functions require a data transfer between smartphone and eBT-2. Switch to the REMOTE tab and tap to the MENU Button (left corner on bottom) and select "Settings"
 |
Settings - Level 1
|
|
|
|
 |
Settings - Level 2
|
Measurement pot diameter: 500 mm
Height of the shaft: 230 mm
Specimen volume: 39,27 Liter (19,6 Liter)
Length probes: 130 mm
Measurement range torque: 0-3 Nm
Measurement range speed. : 0-20°/sec
Resolution angle: 2048 pro rotation
Display: Graphic AMOLED 5,5" LCDisplay in external smartphone HD (1280 x
720)
Handling: Power switch + external smart phone (part of the delivery!)
Interface: Bluetooth 2.0
Power supply: NiMh power accu pack 7,2V 4600mAh
Weight without measurement pot: ca. 9,9 kg (without battery)
|
|
CE Compliance StatementThis product was tested by Schleibinger Geräte Teubert u. Greim GmbH. and found to comply with all the requirements of the EMC Directive 89/336/EEC as amended. |
| Schleibinger Geräte Teubert u. Greim GmbH Gewerbestrasse 4 D-84428 Buchbach Tel. ++49-(0)8086 94010 Fax. ++49-(0)8086 94014 info@schleibinger.com http://www.schleibinger.com Version: 11.02.2015 16:00:55 |
The lattest version of this manual can be obtain here.
Just scan the QR code ! |
Copyright © 2015 Schleibinger Geräte Teubert und Greim GmbH.
All rights reserved.
• SAMSUNG and the SAMSUNG logo are registered trademarks of Samsung Electronics.
• The Android logo, Google™, Google Maps™, Google Mail™, YouTube™, Google Play™ Store, and Google Talk™ are trademarks of Google, Inc.
• Bluetooth® is a registered trademark of Bluetooth SIG, Inc. worldwide.
• Wi-Fi®, Wi-Fi Protected Setup™, Wi-Fi Direct™, Wi-Fi CERTIFIED™, and the Wi-Fi logo are registered trademarks of the Wi-Fi Alliance.
• All other trademarks and copyrights are the property of their respective owners.